
Yes!!!
I burned the new Ubuntu 7.10 live cd and booted from it.
I started using the system and after playing an hour I rebooted from my hard disk...
I only got a blank screen with the words : GRUB
I booted from an old 3 1/2" floppy drive and run the Norton Disk Editor 3.0 and compared the partition table
of my hard disk with a saved copy that I had in a file. Not a single byte was changed...
So the problem was inside the solaris partition.
I booted again from ubuntu Live Cd and I noticed that my solaris partition was used as SWAP!!!.
Here you can see that I have 4 gb swap partition and my partition info...
Why has Ubuntu used a partition ID "BF" (Solaris new partition) as a swap????
Maybe because Ubuntu means "Your Solaris will be destroyed!!!"
I don't want to reinstall Solaris again, I give up.
Bye Java Desktop Environment!!! :-(
Thursday, 8 November 2007
Ubuntu : An african word than means "Your Solaris will be destroyed!!!"

Tuesday, 24 July 2007
Installing stellarium on Ubuntu 7.04
Stellarium is one of the best planetarium programs I have seen and the best of all is that it is free and open source!
To install this gem you must run the following command :
ubuntu@horus:~$ sudo apt-get install stellarium stellarium-data
Password:
Reading package lists... Done
Building dependency tree
Reading state information... Done
The following extra packages will be installed:
libsdl-mixer1.2 libsmpeg0
The following NEW packages will be installed:
libsdl-mixer1.2 libsmpeg0 stellarium stellarium-data
0 upgraded, 4 newly installed, 0 to remove and 0 not upgraded.
Need to get 16.2MB of archives.
After unpacking 22.6MB of additional disk space will be used.
Do you want to continue [Y/n]? y
Get:1 http://ar.archive.ubuntu.com feisty/main libsmpeg0 0.4.5+cvs20030824-1.9build1 [102kB]
Get:2 http://ar.archive.ubuntu.com feisty/main libsdl-mixer1.2 1.2.6-1.1build1 [136kB]
Get:3 http://ar.archive.ubuntu.com feisty/universe stellarium-data 0.8.2-3 [14.2MB]
Get:4 http://ar.archive.ubuntu.com feisty/universe stellarium 0.8.2-3 [1809kB]
Fetched 16.2MB in 2m17s (118kB/s)
Selecting previously deselected package libsmpeg0.
(Reading database ... 116812 files and directories currently installed.)
Unpacking libsmpeg0 (from .../libsmpeg0_0.4.5+cvs20030824-1.9build1_i386.deb) ...
Selecting previously deselected package libsdl-mixer1.2.
Unpacking libsdl-mixer1.2 (from .../libsdl-mixer1.2_1.2.6-1.1build1_i386.deb) ...
Selecting previously deselected package stellarium-data.
Unpacking stellarium-data (from .../stellarium-data_0.8.2-3_all.deb) ...
Selecting previously deselected package stellarium.
Unpacking stellarium (from .../stellarium_0.8.2-3_i386.deb) ...
Setting up libsmpeg0 (0.4.5+cvs20030824-1.9build1) ...
Setting up libsdl-mixer1.2 (1.2.6-1.1build1) ...
Setting up stellarium-data (0.8.2-3) ...
Setting up stellarium (0.8.2-3) ...
After that I ran the stellarium but it started in an invalid screen resolution
so I had to edit its config file :
gedit /home/ubuntu/.stellarium/config.ini
Then I modified the screen resolution, because I use 1400x1050.
So I changed the following lines :
screen_w = 1024
screen_h = 768
for :
screen_w = 1400
screen_h = 1050
Afterward I ran again the stellarium with the command :
stellarium
The basic operations are :
Use the mouse or arrow keys to look around.
Use the page up and page down keys to zoom in and out.
Use the left mouse button to select an object, the right button to deselect the object and middle mouse button or spacebar to center on the selected object.
J slows down or reverses speed, L increases time speed, and K makes time return to normal speed.
You can also use the time control buttons in the lower right of the screen.
It runs on Mac and Micro$oft Window$ too!
I strongly recommend this software.
Monday, 16 July 2007
Running Windows XP under Ubuntu with VirtualBox
A few weeks ago I installed another virtualization product under linux. It's name is VirtualBox
I have been using VmWare but I decided to use an open source virtualization tool. So I found VirtualBox that is freely available under GNU General Public License (GPL).
According to its site :
VirtualBox runs on Windows, Linux and Macintosh hosts and supports a large number of guest operating systems including but not limited to Windows (NT 4.0, 2000, XP, Server 2003, Vista), DOS/Windows 3.x, Linux (2.4 and 2.6), and OpenBSD.
After reading the site I understand that there are two versions, one open source with GPL license and one in binary format with an installer and a PUEL license
First I downloaded the file
virtualbox_1.4.0-21864_Ubuntu_feisty_i386.deb
from the site :
http://www.virtualbox.org/wiki/Downloads
After the download was complete I ran the command :
sudo dpkg -i virtualbox_1.4.0-21864_Ubuntu_feisty_i386.deb
Then it appeared in the menu Applications->Systems :
InnoTek VirtualBox
Afterwards I allowed my user to run virtualbox.
I went to the menu System->Administration->Users and Groups
Clicked on "Manage Groups" and added my user to the group "vboxusers"
I rebooted and afterward I launched the VirtualBox application and pressed the New Button and followed the wizard.
I created a 5 gb disk and a virtual PC with 256MB ram.
I enabled the cdrom drive and inserted the Windows XP that came with the laptop in the cd-rom drive.
Before starting the virtual machine I changed the "Host key" because the default is the right ctrl, but my laptop doesn't have a right-ctrl.
So I selected the menu File->Global Settings and then in the Input option I changed it for the left ctrl (Control_L).
Afterward I started the virtual machine and the Windows XP installer appeared.

If I moved the mouse over the virtual machine window it captured your mouse, to get out I pressed the "host key".
Windows XP was installed with only 800x600x32 bits screen resolution. To have a better resolution I installed the guest add-on (In the running virtual machine window I selected devices->Install Guest Additions).
After that in my case I was able to select 1400x1050x32bits.
And then when I moved my mouse over the virtual box window it captured the mouse, but if I moved the mouse away it freed the control (without need to press the "host key").
I was able to surf the web inside XP, but I want to share a folder between both operating systems so I opened a terminal in ubuntu and ran the command :
VBoxManage sharedfolder add Virtual_Machine -name "sharedfolder" -hostpath "/foldertoshare"
Virtual_Machine : is the name of the virtual machine. Mine is "Windows XP".
sharedfolder : is the name of the resource to be used in the "net use" command under Windows.
foldertoshare : is the name of the folder in ubuntu that you want to share.
Here is the command I used :
ubuntu@horus:~$ VBoxManage sharedfolder add "Windows XP" -name discoD -hostpath /diskD/
I exited the terminal started the virtual machine and after I was logged in windows XP I ran :
net use Z: \\vboxsvr\discoD
Then I was able to share data with my ubuntu.
Here a Picture with the net use command :

Monday, 2 July 2007
Using a file as a Swap Partition for Ubuntu
I have one internal hard disk in my laptop Compaq Presario 1500 with 4 partitions
XP, Ubuntu, Solaris 10, Pc-BSD. So I can't create another partition to use as a swap for Ubuntu. But I have one large external hard disk connected by USB, so I used a file in this disk as a swap partition.
First I created a 1GB file in the disk (already mounted as /diskD/) :
sudo dd if=/dev/zero of=/diskD/swapubuntu bs=1M count=1024
1024+0 records in
1024+0 records out
1073741824 bytes (1.1 GB) copied, 86.4074 seconds, 12.4 MB/s
Afterwards :
sudo mkswap /diskD/swapubuntu
Setting up swapspace version 1, size = 1073737 kB
no label, UUID=6da4119f-3329-4935-a921-10a5cbe521be
Then :
sudo swapon /diskD/swapubuntu
Then just to check I ran the following command :
free
total used free shared buffers cached
Mem: 515852 509052 6800 0 100460 170968
-/+ buffers/cache: 237624 278228
Swap: 1048568 0 1048568
In order to have the swap activated in every reboot I modified the file /etc/init.d/rc.local
sudo gedit /etc/init.d/rc.local
Adding the following line :
swapon /diskD/swapubuntu
Here my rc.local :
#! /bin/sh
PATH=/sbin:/bin:/usr/sbin:/usr/bin
[ -f /etc/default/rcS ] && . /etc/default/rcS
. /lib/lsb/init-functions
do_start() {
if [ -x /etc/rc.local ]; then
log_begin_msg "Running local boot scripts (/etc/rc.local)"
/etc/rc.local
log_end_msg $?
/home/ubuntu/unhide_ICH_SMBus
swapon /diskD/swapubuntu
fi
}
case "$1" in
start)
do_start
;;
restart|reload|force-reload)
echo "Error: argument '$1' not supported" >&2
exit 3
;;
stop)
;;
*)
echo "Usage: $0 start|stop" >&2
exit 3
;;
esac
Friday, 29 June 2007
Installing Ubuntu 7.04 Feisty Fawn on Compaq Presario 1500US
Installing Ubuntu 7.04 Feisty Fawn on Compaq Presario 1500US
Last updated: June 29, 2007
General Hardware Specifications of Compaq Presario 1500US:
Hardware Components | Status under Linux | Notes |
| Pentium IV Processor, 2.4 GHz | Works | To make CPU Frequency Scaling work you must manually edit the file : /etc/modules and add p4-clockmod after installing ubuntu. |
| 14.1 SXGA+ TFT Display | Works | See instructions below |
| ATI Mobility Radeon 7500 (M7) - 32MB Video | Works | See instructions below |
| 512MB, DDR SDRAM, 2DIMMs | Works | No special procedure required during installation |
| TOSHIBA MK4018GAP (40 GB, 4200 RPM, Ultra-ATA/100) Hard Drive | Works | No special procedure required during installation |
| Internal Floppy Drive | Works | No special procedure required during installation |
| Integrated Network Card - Intel(R) PRO/100 VE | Works | No special procedure required during installation |
| Internal 56k Modem - SoftV92 - Harmonics (Conexant) HSF 56k HSFi Modem | Works only in 14400 bauds | You must install the proprietary HSF driver from Linuxant. Free version works only in 14400 bauds. Full version with 56K support for USD 19 |
| TOSHIBA DVD-ROM SD-R2102 (DVD:8x, CD:8x/8x/24x DVD-ROM/CD-RW) | Works | No special procedure required during installation |
| SoundMAX Integrated Digital Audio - Intel 82801CA ICH3-S - AC'97 Audio Controller | Works | No special procedure required during installation |
| Lithium-Ion Battery | Works | No special procedure required during installation |
This laptop is now operating under Kernel version 2.6.20-16-generic
- Why use Ubuntu :
I always used Slackware in this laptop (I tested other distributions too) but I decided to test Ubuntu because a lot of people are talking about this distribution and has superb forums.
According to distrowatch is the most popular linux distribution! - Obtaining Ubuntu :
You can download Ubuntu from the site :
Ubuntu Download
Select the : Standard personal computer (x86 architecture) version.
Afterwards burn the live-cd, insert it in the cdrom and reboot the notebook. - Installing :
After the computer reboots you will see a menu with a few options :
Select :
"Start or install Ubuntu"
Configuring the video display
After a few seconds you will see a garbled display.
Here a photo :
Then you must press "crtl-alt-f2" and run the command :
sudo dpkg-reconfigure xserver-xorg
Then you have to choose the following options :
Attempt to autodetect video hardware? : "Yes"
X server driver : "ati"
Identifier for your video card : "ATI Technologies Inc Radeon Mobility M7 LW [Radeon Mobility 7500]"
Video card's Bus identifier : "PCI:1:0:0"
Amount of memory (KB) to be used by the video card : "32768"
Use Kernel Framebuffer device interface : "Yes"
Then a few questions about the Keyboard & mouse
Write default files section to configuration file ? : "Yes"
Attempt Monitor Autodetection ? : "Yes"
Identifier for the monitor : "Generic Monitor"
Video Modes to be used by the X server : "1400 x 1050"
Method for selecting the monitor characteristics ? : "Medium"
Resolution : "1400x1050 @ 60Hz"
Write monitor sync ranges to the configuration file : "Yes"
Desired default color depth in bits : "16"
Then return to the gnome session usign the crtl-alt-F7
And press the ctrl-alt-backspace twice. Then the gnome will restart with a 1400x1050 @ 60Hz resolution without problem.
Then from the system menu select Install Ubuntu.
Partition the hard disk (if need) and continue the installation. - Post-Install modifications/tweaks
After reboot open a terminal and edit manually the /etc/X11/xorg.conf file with the command :
sudo gedit /etc/X11/xorg.conf
And modify the file as show below :
Section "Device"
Identifier "ATI RADEON 7500"
Driver "radeon"
BusID "PCI:1:0:0"
VideoRam 32768
Option "AGPMode" "4"
Option "AGPSize" "32"
Option "XAANoOffscreenPixmaps"
Option "DRI" "true"
Option "AGPFastWrite" "true"
Option "EnablePageFlip" "true"
EndSection
Section "Monitor"
Identifier "Generic Monitor"
Option "DPMS"
HorizSync 30-81
VertRefresh 56-75
EndSection
Section "Screen"
Identifier "Default Screen"
Device "ATI RADEON 7500"
Monitor "Generic Monitor"
DefaultDepth 16
SubSection "Display"
Depth 1
Modes "1400x1050"
EndSubSection
SubSection "Display"
Depth 4
Modes "1400x1050"
EndSubSection
SubSection "Display"
Depth 8
Modes "1400x1050"
EndSubSection
SubSection "Display"
Depth 15
Modes "1400x1050"
EndSubSection
SubSection "Display"
Depth 16
Modes "1400x1050"
EndSubSection
SubSection "Display"
Depth 24
Modes "1400x1050"
EndSubSection
EndSection
Section "DRI"
Mode 0666
EndSection
Section "Extensions"
Option "Composite" "Enable"
EndSection
With these settings you will have a 1000 fps according to the glxgears command.
Afterwards you can activate the desktop effect. Just go to the menu : System->Preferences and select "Desktop Effect" then press the button "Enable Desktop Effect" and activate the options :
"Windows Wobble when Moved"
"Workspaces on a Cube"
Then in a terminal run the following commands :
gconftool-2 --type int --set /apps/compiz/general/screen0/options/hsize 4
gconftool-2 --type int --set /apps/compiz/general/screen0/options/number_of_desktops 1
Then you can press the ctrl+alt+left arrow or the ctrl+alt+Button1 mouse and the cube should work!!!


- Making CPU Frequency Scaling work for you
If you press the right mouse buttom over the taskbar (the panel) and select "Add to panel" you will see many applets and if you select the CPU Frequency Applet, you will get an error message saying CPU Frequency Scaling is not Supported.
In order to make it work you must open a terminal an run the command :
sudo gedit /etc/modules
And add the following line at the end of the file :
p4-clockmod
In order to test it you can run the following commands :
sudo modprobe p4-clockmod
sudo powernowd
You should get an output similar to this :
powernowd: PowerNow Daemon v0.97, (c) 2003-2006 John Clemens
powernowd: Found 1 scalable unit: -- 1 'CPU' per scalable unit
powernowd: cpu0: 300Mhz - 2400Mhz (8 steps) - Getting connected using the modem
I made the modem work using the driver from Linuxant, I couldn't find an open source driver for it.
According to Linuxant site :
This cannot be effectively done by the open-source community because a significant portion of such drivers is technology protected by trade secrets, patents, or other restrictions, and it requires a NDA (Non-Disclosure Agreement) which most open-source developers are not willing or not able to sign without getting into a difficult position.
So basically you must download the driver from their site :
Linuxant Download for Ubuntu
Select the file :
hsfmodem_7.60.00.09full_k2.6.20_16_generic_ubuntu_i386.deb.zip
Be carefull to download the correct version of the driver, it depends of the kernel you are using.
You can obtain your kernel version with the command :
uname -r
After install the package you could run the command :
wvdial
and then manually edit the file /etc/wvdial.conf
sudo gedit /etc/wvdial.conf
and add the following lines :
[Modem0]
Modem = /dev/modem
Baud = 115200
Init1 = ATZ
Init2 = ATQ0 V1 E1 S0=0 &C1 &D2 +FCLASS=0
SetVolume = 1
Dial Command = ATDT
Init4 = ATM1L3
[Dialer Defaults]
Init1 = ATZ
Init2 = ATQ0 V1 E1 S0=0 &C1 &D2 +FCLASS=0
Modem Type = Analog Modem
Baud = 115200
New PPPD = yes
Modem = /dev/modem
ISDN = 0
SetVolume = 1
Dial Command = ATDT
Init4 = ATM1L3
; Phone =
; Password =
; Username =
[Dialer ppp0]
Username = alternativa
Password = gratis
Phone = 55555555
Inherits = Dialer Defaults
Stupid mode = 1
As you can see I used the username, password and telephone number of a free ISP here in Buenos Aires, Argentina (replace with your ISP data).
After that you can test the connection using the command :
wvdial ppp0
Here is the output :
--> WvDial: Internet dialer version 1.56
--> Initializing modem.
--> Sending: ATZ
ATZ
OK
--> Sending: ATQ0 V1 E1 S0=0 &C1 &D2 +FCLASS=0
ATQ0 V1 E1 S0=0 &C1 &D2 +FCLASS=0
OK
--> Sending: ATM1L3
ATM1L3
OK
--> Modem initialized.
--> Sending: ATDT55555555
--> Waiting for carrier.
ATDT55555555
CONNECT 115200
--> Carrier detected. Starting PPP immediately.
--> Starting pppd at Thu Jun 28 21:31:15 2007
--> Pid of pppd: 8812
--> Using interface ppp0
--> pppd: [08][01][06][08][08][02][06][08]
--> pppd: [08][01][06][08][08][02][06][08]
--> pppd: [08][01][06][08][08][02][06][08]
--> pppd: [08][01][06][08][08][02][06][08]
--> pppd: [08][01][06][08][08][02][06][08]
--> local IP address xxx.xxx.xx.xxx
--> pppd: [08][01][06][08][08][02][06][08]
--> remote IP address xxx.xx.xxx.xxx
--> pppd: [08][01][06][08][08][02][06][08]
--> primary DNS address xxx.xx.xxx.x
--> pppd: [08][01][06][08][08][02][06][08]
--> secondary DNS address xxx.xxx.xxx.xx
--> pppd: [08][01][06][08][08][02][06][08]
After that you will be able to browse the web at 14400bps. Here is a picture of my test :
Notice that you will see in the panel (taskbar) a message of restricted driver "Conexant modem engine". - Installing lm-sensors to monitor CPU temperature
Here is an extract of my more detailed explanation located at :
Installing lm-sensors on Presario 1500
First you must install the lm-sensors package :
sudo apt-get install lm-sensors
Then you must download the script "unhide_ICH_SMBus" that show the chip/sensor :
Here the link :
unhide_ICH_SMBus
Remember to make the file executable using the chmod +x
Then run the script :
ubuntu@horus:~$ sudo ./unhide_ICH_SMBus
Password:
Enabling SMBus PCI device ...
Rescanning the bus ...
Loading i2c-i801 ...
00:1f.3 SMBus: Intel Corporation 82801CA/CAM SMBus Controller (rev 02)
Done!
After that you must execute :
sudo sensors-detect
Then the program will show you the following lines :
To make the sensors modules behave correctly, add these lines to
/etc/modules:
#----cut here----
# I2C adapter drivers
i2c-i801
# Chip drivers
adm1031
eeprom
#----cut here----
Do you want to add these lines to /etc/modules automatically? (yes/NO)
Select "Yes".
To make the sensors work in every boot you have to run the unhide_ICH_SMBus first.
In order to run the command in every boot I edited the file /etc/init.d/rc.local:
sudo gedit /etc/init.d/rc.local
Then I added the line calling unhide_ICH_SMBus first :
#! /bin/sh
PATH=/sbin:/bin:/usr/sbin:/usr/bin
[ -f /etc/default/rcS ] && . /etc/default/rcS
. /lib/lsb/init-functions
do_start() {
if [ -x /etc/rc.local ]; then
log_begin_msg "Running local boot scripts (/etc/rc.local)"
/etc/rc.local
log_end_msg $?
/home/ubuntu/unhide_ICH_SMBus
fi
}
case "$1" in
start)
do_start
;;
restart|reload|force-reload)
echo "Error: argument '$1' not supported" >&2
exit 3
;;
stop)
;;
*)
echo "Usage: $0 start|stop" >&2
exit 3
;;
esac
Afterwards you can download an applet to show the temperature in the panel :
Computer Temp 0.9.6.1
You can install it with a simple double-click and after that you can right click in the panel (taskbar) and select "Add to panel" then browse to "System and Hardware" and select "Computer temperature monitor".
Here is a picture with the Temperature and CPU frequency monitors in the panel :


- Free modem driver to work in 56K and with faxing capabilities
- Test the S-Video Out function
- /etc/X11/xorg.conf
# /etc/X11/xorg.conf (xorg X Window System server configuration file)
#
# This file was generated by dexconf, the Debian X Configuration tool, using
# values from the debconf database.
#
# Edit this file with caution, and see the xorg.conf(5) manual page.
# (Type "man xorg.conf" at the shell prompt.)
#
# This file is automatically updated on xserver-xorg package upgrades *only*
# if it has not been modified since the last upgrade of the xserver-xorg
# package.
#
# If you have edited this file but would like it to be automatically updated
# again, run the following command:
# sudo dpkg-reconfigure -phigh xserver-xorg
Section "Files"
FontPath "/usr/share/fonts/X11/misc"
FontPath "/usr/share/fonts/X11/cyrillic"
FontPath "/usr/share/fonts/X11/100dpi/:unscaled"
FontPath "/usr/share/fonts/X11/75dpi/:unscaled"
FontPath "/usr/share/fonts/X11/Type1"
FontPath "/usr/share/fonts/X11/100dpi"
FontPath "/usr/share/fonts/X11/75dpi"
# path to defoma fonts
FontPath "/var/lib/defoma/x-ttcidfont-conf.d/dirs/TrueType"
EndSection
Section "Module"
Load "bitmap"
Load "ddc"
Load "dri"
Load "extmod"
Load "freetype"
Load "glx"
Load "int10"
Load "vbe"
EndSection
Section "InputDevice"
Identifier "Generic Keyboard"
Driver "kbd"
Option "CoreKeyboard"
Option "XkbRules" "xorg"
Option "XkbModel" "pc105"
Option "XkbLayout" "us"
EndSection
Section "InputDevice"
Identifier "Configured Mouse"
Driver "mouse"
Option "CorePointer"
Option "Device" "/dev/input/mice"
Option "Protocol" "ImPS/2"
Option "ZAxisMapping" "4 5"
Option "Emulate3Buttons" "true"
EndSection
Section "InputDevice"
Identifier "Synaptics Touchpad"
Driver "synaptics"
Option "SendCoreEvents" "true"
Option "Device" "/dev/psaux"
Option "Protocol" "auto-dev"
Option "HorizScrollDelta" "0"
EndSection
Section "InputDevice"
Driver "wacom"
Identifier "stylus"
Option "Device" "/dev/input/wacom"
Option "Type" "stylus"
Option "ForceDevice" "ISDV4" # Tablet PC ONLY
EndSection
Section "InputDevice"
Driver "wacom"
Identifier "eraser"
Option "Device" "/dev/input/wacom"
Option "Type" "eraser"
Option "ForceDevice" "ISDV4" # Tablet PC ONLY
EndSection
Section "InputDevice"
Driver "wacom"
Identifier "cursor"
Option "Device" "/dev/input/wacom"
Option "Type" "cursor"
Option "ForceDevice" "ISDV4" # Tablet PC ONLY
EndSection
Section "Device"
Identifier "ATI RADEON 7500"
Driver "radeon"
BusID "PCI:1:0:0"
VideoRam 32768
Option "AGPMode" "4"
Option "AGPSize" "32"
Option "XAANoOffscreenPixmaps"
Option "DRI" "true"
Option "AGPFastWrite" "true"
Option "EnablePageFlip" "true"
EndSection
Section "Monitor"
Identifier "Generic Monitor"
Option "DPMS"
HorizSync 30-81
VertRefresh 56-75
EndSection
Section "Screen"
Identifier "Default Screen"
Device "ATI RADEON 7500"
Monitor "Generic Monitor"
DefaultDepth 16
SubSection "Display"
Depth 1
Modes "1400x1050"
EndSubSection
SubSection "Display"
Depth 4
Modes "1400x1050"
EndSubSection
SubSection "Display"
Depth 8
Modes "1400x1050"
EndSubSection
SubSection "Display"
Depth 15
Modes "1400x1050"
EndSubSection
SubSection "Display"
Depth 16
Modes "1400x1050"
EndSubSection
SubSection "Display"
Depth 24
Modes "1400x1050"
EndSubSection
EndSection
Section "ServerLayout"
Identifier "Default Layout"
Screen "Default Screen"
InputDevice "Generic Keyboard"
InputDevice "Configured Mouse"
InputDevice "stylus" "SendCoreEvents"
InputDevice "cursor" "SendCoreEvents"
InputDevice "eraser" "SendCoreEvents"
InputDevice "Synaptics Touchpad"
EndSection
Section "DRI"
Mode 0666
EndSection
Section "Extensions"
Option "Composite" "Enable"
EndSection
- /etc/modules
# /etc/modules: kernel modules to load at boot time.
#
# This file contains the names of kernel modules that should be loaded
# at boot time, one per line. Lines beginning with "#" are ignored.
fuse
lp
sbp2
# Generated by sensors-detect on Thu Jun 14 21:25:02 2007
# I2C adapter drivers
i2c-i801
# Chip drivers
adm1031
eeprom
p4-clockmod - /etc/wvdial.conf
[Modem0]
Modem = /dev/modem
Baud = 115200
Init1 = ATZ
Init2 = ATQ0 V1 E1 S0=0 &C1 &D2 +FCLASS=0
SetVolume = 1
Dial Command = ATDT
Init4 = ATM1L3
[Dialer Defaults]
Init1 = ATZ
Init2 = ATQ0 V1 E1 S0=0 &C1 &D2 +FCLASS=0
Modem Type = Analog Modem
Baud = 115200
New PPPD = yes
Modem = /dev/modem
ISDN = 0
SetVolume = 1
Dial Command = ATDT
Init4 = ATM1L3
; Phone =
; Password =
; Username =
[Dialer ppp0]
Username = alternativa
Password = gratis
Phone = 55555555
Inherits = Dialer Defaults
Stupid mode = 1
- lspci
root@horus:/home/ubuntu# lspci
00:00.0 Host bridge: Intel Corporation 82845 845 (Brookdale) Chipset Host Bridge (rev 04)
00:01.0 PCI bridge: Intel Corporation 82845 845 (Brookdale) Chipset AGP Bridge (rev 04)
00:1e.0 PCI bridge: Intel Corporation 82801 Mobile PCI Bridge (rev 42)
00:1f.0 ISA bridge: Intel Corporation 82801CAM ISA Bridge (LPC) (rev 02)
00:1f.1 IDE interface: Intel Corporation 82801CAM IDE U100 (rev 02)
00:1f.3 SMBus: Intel Corporation 82801CA/CAM SMBus Controller (rev 02)
00:1f.5 Multimedia audio controller: Intel Corporation 82801CA/CAM AC'97 Audio Controller (rev 02)
01:00.0 VGA compatible controller: ATI Technologies Inc Radeon Mobility M7 LW [Radeon Mobility 7500]
02:04.0 Communication controller: Conexant HSF 56k HSFi Modem (rev 01)
02:05.0 FireWire (IEEE 1394): Texas Instruments TSB43AB22/A IEEE-1394a-2000 Controller (PHY/Link)
02:06.0 CardBus bridge: Texas Instruments PCI1410 PC card Cardbus Controller (rev 02)
02:08.0 Ethernet controller: Intel Corporation 82801CAM (ICH3) PRO/100 VE (LOM) Ethernet Controller (rev 42)
02:0e.0 USB Controller: NEC Corporation USB (rev 41)
02:0e.1 USB Controller: NEC Corporation USB (rev 41)
02:0e.2 USB Controller: NEC Corporation USB 2.0 (rev 02)
03:00.0 USB Controller: NEC Corporation USB (rev 43)
03:00.1 USB Controller: NEC Corporation USB (rev 43)
03:00.2 USB Controller: NEC Corporation USB 2.0 (rev 04)
- My blog with more tips on Ubuntu and installing other operating system on a Compaq Presario 1500 Laptop
Solaris 10
PC-BSD 1.3.01 - Link to the laptop manufacturer
Compaq Presario 1500US Notebook PC - Linux on Laptops!

This laptop works very well. I have been using it for four years with many operating systems without hardware problems.
The only problem is its tendency to overheat. So you have to clean it with compressed air every 6 months.
Friday, 15 June 2007
Installing lm-sensors on a Presario 1500
I continue configuring and tweaking my ubuntu 7.04 Feisty Fawn on my Compaq presario 1500US.
Yesterday I configured the lm-sensors package in order to install a desklet or an application to see the current motherboard temperature. Because this laptop has a tendency to overheat! (see my other post :
Notebook overheat problem or Frying Eggs on Presario 1500)
First of all I launched Synaptic and searched "lm-sensors" and installed the package without problem.
(another option is to run in a terminal : sudo apt-get install lm-sensors)
Then I Ran the command :
sudo sensors-detect
and I obtained the following text :
ubuntu@horus:~$ sudo sensors-detect
Password:
# sensors-detect revision 4171 (2006-09-24 03:37:01 -0700)
This program will help you determine which kernel modules you need
to load to use lm_sensors most effectively. It is generally safe
and recommended to accept the default answers to all questions,
unless you know what you're doing.
We can start with probing for (PCI) I2C or SMBus adapters.
Do you want to probe now? (YES/no): yes
Probing for PCI bus adapters...
Sorry, no known PCI bus adapters found.
We will now try to load each adapter module in turn.
If you have undetectable or unsupported adapters, you can have them
scanned by manually loading the modules before running this script.
To continue, we need module `i2c-dev' to be loaded.
Do you want to load `i2c-dev' now? (YES/no): yes
Module loaded successfully.
We are now going to do the I2C/SMBus adapter probings. Some chips may
be double detected; we choose the one with the highest confidence
value in that case.
If you found that the adapter hung after probing a certain address,
you can specify that address to remain unprobed.
Some chips are also accessible through the ISA I/O ports. We have to
write to arbitrary I/O ports to probe them. This is usually safe though.
Yes, you do have ISA I/O ports even if you do not have any ISA slots!
Do you want to scan the ISA I/O ports? (YES/no): yes
Probing for `National Semiconductor LM78' at 0x290... No
Probing for `National Semiconductor LM78-J' at 0x290... No
Probing for `National Semiconductor LM79' at 0x290... No
Probing for `Winbond W83781D' at 0x290... No
Probing for `Winbond W83782D' at 0x290... No
Probing for `Winbond W83627HF' at 0x290... No
Probing for `Silicon Integrated Systems SIS5595'... No
Probing for `VIA VT82C686 Integrated Sensors'... No
Probing for `VIA VT8231 Integrated Sensors'... No
Probing for `AMD K8 thermal sensors'... No
Probing for `IPMI BMC KCS' at 0xca0... No
Probing for `IPMI BMC SMIC' at 0xca8... No
Some Super I/O chips may also contain sensors. We have to write to
standard I/O ports to probe them. This is usually safe.
Do you want to scan for Super I/O sensors? (YES/no): yes
Probing for Super-I/O at 0x2e/0x2f
Trying family `ITE'... Yes
Found unknown chip with ID 0xea11
Trying family `National Semiconductor'... Yes
Found `Nat. Semi. PC8739x Super IO'
(no hardware monitoring capabilities)
Trying family `SMSC'... Yes
Found unknown chip with ID 0xea11
Trying family `VIA/Winbond/Fintek'... Yes
Found unknown chip with ID 0xea11
Probing for Super-I/O at 0x4e/0x4f
Trying family `ITE'... No
Trying family `National Semiconductor'... No
Trying family `SMSC'... No
Trying family `VIA/Winbond/Fintek'... No
Sorry, no sensors were detected.
Either your sensors are not supported, or they are connected to an
I2C or SMBus adapter that is not supported. See doc/FAQ,
doc/lm_sensors-FAQ.html or http://www.lm-sensors.org/wiki/FAQ
(FAQ #4.24.3) for further information.
If you find out what chips are on your board, check
http://www.lm-sensors.org/wiki/Devices for driver status.
So, basically the sensors package didn't detect the sensors.
I read an installation instruction and ran the commands :
sudo gedit makedev.sh
Copy the next lines :
#!/bin/bash
# Here you can set several defaults.
# The number of devices to create (max: 256)
NUMBER=32
# The owner and group of the devices
OUSER=root
OGROUP=root
# The mode of the devices
MODE=600
# This script doesn't need to be run if devfs is used
if [ -r /proc/mounts ] ; then
if grep -q "/dev devfs" /proc/mounts ; then
echo "You do not need to run this script as your system uses devfs."
exit;
fi
fi
i=0;
while [ $i -lt $NUMBER ] ; do
echo /dev/i2c-$i
mknod -m $MODE /dev/i2c-$i c 89 $i exit
chown "$OUSER:$OGROUP" /dev/i2c-$i exit
i=$[$i + 1]
done
#end of file
Then :
sudo chmod +x makedev.sh
sudo ./makedev.sh
Afterwards I ran again sensors-detect but nothing changed... then I remembered that in my M$ Windows I used the motherboard monitor and later the speedfan so I booted M$ Windows and obtained the Speedfan output :
Win9x:NO 64Bit:NO GiveIO:YES SpeedFan:YES
I/O properly initialized
Linked ISA BUS at $0290
SMBus successfully enabled
Linked Intel 82801CAM ICH3 SMBUS at $1200
Scanning ISA BUS at $0290...
SuperIO Chip=PC8739x
Scanning Intel SMBus at $1200...
ADM1031 (ID=$31) found on SMBus at $2C
SMART Enabled for drive 0
Found TOSHIBA MK4018GAP (40,0GB)
Found ACPI temperature (59,0C)
End of detection
After that I found out the chip/sensor for my laptop an Intel 82801CAM ICH3 with an ADM1031. So I checked the www.lm-sensors.org and found that that chip/sensor is supported.
After searching and trying many things I finally found the script "unhide_ICH_SMBus" that show my chip/sensor :
You can download it from :
unhide_ICH_SMBus
Just in case here is the script (you can cut and paste using the gedit) :
#!/bin/bash
# (C) Rudolf Marek
# Jean Delvare
#
# Thanks Jean Delvare and Oliver Dreier
#
# This program is free software; you can redistribute it and/or modify
# it under the terms of the GNU General Public License version 2
# as published by the Free Software Foundation
pcibus="/sys/bus/pci/slots/"
device="00:1f"
if [ "$UID" -ne 0 ] ; then
echo "You need to be root to run this script!"
exit 252
fi
smbus=`lspci -n -s $device.3 grep -i '0c05: *8086'`
if [ -n "$smbus" ] ; then
echo "ICH SMBus is already there!"
lspci -s $device.3
exit
fi
intel=`lspci -n -s $device.0 grep 8086`
if [ -z "$intel" ] ; then
echo "Not for your chipset - Intel (ICH) only"
exit 255;
fi
modprobe fakephp &> /dev/null
if [ ! -d "$pcibus" ] ; then
echo "You need the fake PCI hotplug driver! (fakephp.ko and 2.6 kernel)"
exit 255;
fi
echo "Enabling SMBus PCI device ..."
newval=$( printf '%x' $((0x$(setpci -s $device.0 f2.w) & 0xfff7)))
setpci -s $device.0 f2.w=$newval
echo "Rescanning the bus ..."
echo 1 > $pcibus/0000:$device.0/power 2>/dev/null
if [ ! -d "$pcibus/0000:$device.3" ] ; then
echo "Failed to enable the SMBUS"
exit 253;
fi
if [ ! -d "/sys/bus/pci/drivers/i801_smbus" ] ; then
echo "Loading i2c-i801 ..."
modprobe i2c-i801
if [ $? -ne 0 ] ; then
exit 251
fi
fi
lspci -s $device.3
echo "Done!"
-----------------------------
I ran the script :
ubuntu@horus:~$ sudo ./unhide_ICH_SMBus
Password:
Enabling SMBus PCI device ...
Rescanning the bus ...
Loading i2c-i801 ...
00:1f.3 SMBus: Intel Corporation 82801CA/CAM SMBus Controller (rev 02)
Done!
Afterwards I ran again :
sudo sensors-detect
And this time it ran Ok.
Here the output :
ubuntu@horus:~$ sudo sensors-detect
Password:
# sensors-detect revision 4171 (2006-09-24 03:37:01 -0700)
This program will help you determine which kernel modules you need
to load to use lm_sensors most effectively. It is generally safe
and recommended to accept the default answers to all questions,
unless you know what you're doing.
We can start with probing for (PCI) I2C or SMBus adapters.
Do you want to probe now? (YES/no): yes
Probing for PCI bus adapters...
Use driver `i2c-i801' for device 0000:00:1f.3: Intel 82801CA/CAM ICH3
We will now try to load each adapter module in turn.
Module `i2c-i801' already loaded.
If you have undetectable or unsupported adapters, you can have them
scanned by manually loading the modules before running this script.
To continue, we need module `i2c-dev' to be loaded.
Do you want to load `i2c-dev' now? (YES/no): yes
Module loaded successfully.
We are now going to do the I2C/SMBus adapter probings. Some chips may
be double detected; we choose the one with the highest confidence
value in that case.
If you found that the adapter hung after probing a certain address,
you can specify that address to remain unprobed.
Next adapter: SMBus I801 adapter at 1200
Do you want to scan it? (YES/no/selectively): yes
Client found at address 0x2c
Probing for `Myson MTP008'... No
Probing for `National Semiconductor LM78'... No
Probing for `National Semiconductor LM78-J'... No
Probing for `National Semiconductor LM79'... No
Probing for `National Semiconductor LM80'... No
Probing for `National Semiconductor LM85 or LM96000'... No
Probing for `Analog Devices ADM1027, ADT7460 or ADT7463'... No
Probing for `SMSC EMC6D100, EMC6D101 or EMC6D102'... No
Probing for `Analog Devices ADT7462'... No
Probing for `Analog Devices ADT7470'... No
Probing for `Analog Devices ADT7476'... No
Probing for `National Semiconductor LM87'... No
Probing for `National Semiconductor LM93'... No
Probing for `Winbond W83781D'... No
Probing for `Winbond W83782D'... No
Probing for `Winbond W83792D'... No
Probing for `Winbond W83793R/G'... No
Probing for `Winbond W83791SD'... No
Probing for `Winbond W83627HF'... No
Probing for `Winbond W83627EHF'... No
Probing for `Winbond W83627DHG'... No
Probing for `Asus AS99127F (rev.1)'... No
Probing for `Asus AS99127F (rev.2)'... No
Probing for `Asus ASB100 Bach'... No
Probing for `Genesys Logic GL518SM Revision 0x00'... No
Probing for `Genesys Logic GL518SM Revision 0x80'... No
Probing for `Genesys Logic GL520SM'... No
Probing for `Analog Devices ADM9240'... No
Probing for `Dallas Semiconductor DS1780'... No
Probing for `National Semiconductor LM81'... No
Probing for `Analog Devices ADM1026'... No
Probing for `Analog Devices ADM1025'... No
Probing for `Philips NE1619'... No
Probing for `Analog Devices ADM1024'... No
Probing for `Analog Devices ADM1029'... No
Probing for `Analog Devices ADM1030'... No
Probing for `Analog Devices ADM1031'... Success!
(confidence 7, driver `adm1031')
Probing for `Analog Devices ADM1022'... No
Probing for `Texas Instruments THMC50'... No
Probing for `ITE IT8712F'... No
Probing for `ALi M5879'... No
Probing for `SMSC LPC47M15x, LPC47M192 or LPC47M997'... No
Probing for `Winbond W83791D'... No
Client found at address 0x50
Probing for `Analog Devices ADM1033'... No
Probing for `Analog Devices ADM1034'... No
Probing for `SPD EEPROM'... Success!
(confidence 8, driver `eeprom')
Probing for `EDID EEPROM'... No
Probing for `Maxim MAX6900'... No
Client found at address 0x51
Probing for `Analog Devices ADM1033'... No
Probing for `Analog Devices ADM1034'... No
Probing for `SPD EEPROM'... Success!
(confidence 8, driver `eeprom')
Client found at address 0x69
Some chips are also accessible through the ISA I/O ports. We have to
write to arbitrary I/O ports to probe them. This is usually safe though.
Yes, you do have ISA I/O ports even if you do not have any ISA slots!
Do you want to scan the ISA I/O ports? (YES/no): yes
Probing for `National Semiconductor LM78' at 0x290... No
Probing for `National Semiconductor LM78-J' at 0x290... No
Probing for `National Semiconductor LM79' at 0x290... No
Probing for `Winbond W83781D' at 0x290... No
Probing for `Winbond W83782D' at 0x290... No
Probing for `Winbond W83627HF' at 0x290... No
Probing for `Silicon Integrated Systems SIS5595'... No
Probing for `VIA VT82C686 Integrated Sensors'... No
Probing for `VIA VT8231 Integrated Sensors'... No
Probing for `AMD K8 thermal sensors'... No
Probing for `IPMI BMC KCS' at 0xca0... No
Probing for `IPMI BMC SMIC' at 0xca8... No
Some Super I/O chips may also contain sensors. We have to write to
standard I/O ports to probe them. This is usually safe.
Do you want to scan for Super I/O sensors? (YES/no): yes
Probing for Super-I/O at 0x2e/0x2f
Trying family `ITE'... Yes
Found unknown chip with ID 0xea11
Trying family `National Semiconductor'... Yes
Found `Nat. Semi. PC8739x Super IO'
(no hardware monitoring capabilities)
Trying family `SMSC'... Yes
Found unknown chip with ID 0xea11
Trying family `VIA/Winbond/Fintek'... Yes
Found unknown chip with ID 0xea11
Probing for Super-I/O at 0x4e/0x4f
Trying family `ITE'... No
Trying family `National Semiconductor'... No
Trying family `SMSC'... No
Trying family `VIA/Winbond/Fintek'... No
Now follows a summary of the probes I have just done.
Just press ENTER to continue:
Driver `adm1031' (should be inserted):
Detects correctly:
* Bus `SMBus I801 adapter at 1200'
Busdriver `i2c-i801', I2C address 0x2c
Chip `Analog Devices ADM1031' (confidence: 7)
Driver `eeprom' (should be inserted):
Detects correctly:
* Bus `SMBus I801 adapter at 1200'
Busdriver `i2c-i801', I2C address 0x50
Chip `SPD EEPROM' (confidence: 8)
* Bus `SMBus I801 adapter at 1200'
Busdriver `i2c-i801', I2C address 0x51
Chip `SPD EEPROM' (confidence: 8)
EEPROMs are *NOT* sensors! They are data storage chips commonly
found on memory modules (SPD), in monitors (EDID), or in some
laptops, for example.
I will now generate the commands needed to load the required modules.
Just press ENTER to continue:
To make the sensors modules behave correctly, add these lines to
/etc/modules:
#----cut here----
# I2C adapter drivers
i2c-i801
# Chip drivers
adm1031
eeprom
#----cut here----
Do you want to add these lines to /etc/modules automatically? (yes/NO)
I selected "Yes".
Then in order to test it I ran the commands :
root@horus:/home/ubuntu# sudo modprobe i2c-i801
Password:
root@horus:/home/ubuntu# sudo modprobe adm1031
Password:
root@horus:/home/ubuntu# sudo modprobe eeprom
Password:
root@horus:/home/ubuntu# sudo depmod -a
Password:
root@horus:/home/ubuntu# sudo update-modules
Password:
root@horus:/home/ubuntu# sudo sensors
Password:
adm1031-i2c-0-2c
Adapter: SMBus I801 adapter at 1200
CPU Fan: 12053 RPM (min = 661 RPM, div = 4)
Case Fan: 16875 RPM (min = 661 RPM, div = 4)
SYS Temp: +57.0°C (low = +51°C, high = +70°C)
SYS Crit: +87°C
CPU Temp: +52.5°C (low = +46°C, high = +60°C)
CPU Crit: +75°C
AUX Temp: +0.0°C (low = +0°C, high = +80°C) DISCONNECT
AUX Crit: +100°C
I checked the /etc/modules file and all was correct. So I restarted Ubuntu and after booting I ran :
sudo sensors
But only got "No sensors detected".
To make the sensors work I had to run the unhide_ICH_SMBus first. In order to run the command in every boot I edited the file /etc/init.d/rc.local:
sudo gedit /etc/init.d/rc.local
Then I added the line calling unhide_ICH_SMBus first :
#! /bin/sh
PATH=/sbin:/bin:/usr/sbin:/usr/bin
[ -f /etc/default/rcS ] && . /etc/default/rcS
. /lib/lsb/init-functions
do_start() {
if [ -x /etc/rc.local ]; then
log_begin_msg "Running local boot scripts (/etc/rc.local)"
/etc/rc.local
log_end_msg $?
/home/ubuntu/unhide_ICH_SMBus
fi
}
case "$1" in
start)
do_start
;;
restart|reload|force-reload)
echo "Error: argument '$1' not supported" >&2
exit 3
;;
stop)
;;
*)
echo "Usage: $0 start|stop" >&2
exit 3
;;
esac
Afterwards I restarted Ubuntu and this time the sensors worked!
I decided to install a gdesklet to see the mother/cpu temperature in the desktop, unfortunately after trying every gDesklet that show sensors/temperature I gave up... none of them worked!!!
Finally I found the application that I wanted :

You can download the .deb package for Ubuntu Feisty here :
computertemp_0.9.6.1-0ubuntu1_all.deb
After installed with a simple double-click I right clicked in the task-bar and select "Add to panel" then browsed to
"System and Hardware" and selected "Computer temperature monitor".

Then the temperature reading appeared in the task bar :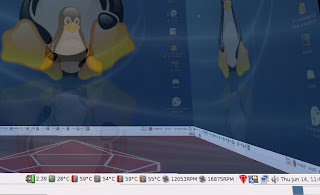
Thursday, 14 June 2007
Installing a Weather Desklet on Ubuntu 7.04
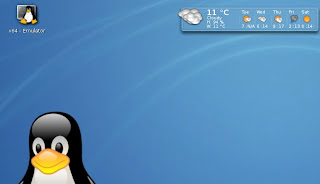
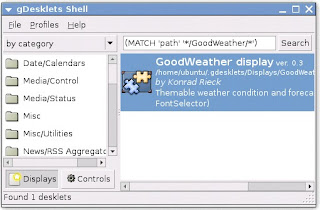
Then double click on it and place it on the desktop.
Wednesday, 13 June 2007
Running Vice 1.21 Commodore Emulator under Ubuntu 7.04
Last weekend I installed Vice 1.21 - Commodore Emulator on my Ubuntu 7.04 - Festy Fawn.
First I downloaded the tarball (source code) from the site
vice-1.21.tar.gz
The official site of Vice is :
Vice Team
VICE is free software; you can redistribute it and/or modify it under the terms of the GNU General Public License as published by the Free Software Foundation; either version 2 of the License, or (at your option) any later version.
So don't be afraid to download it!
Then I opened a terminal and ran the commands In order to obtain the gcc compiler :
sudo apt-get install build-essential
Then I decompressed the file with the command :
tar xvfz vice-1.21.tar.gz
Then I changed the current directory to the /vice-1.21 and ran the command :
sudo ./configure
Then I ran :
sudo make
Then I got the following errors :
../../src/arch/unix/x11/xaw/uiarch.h:33:27: error: X11/Intrinsic.h: No such file or directory
../../src/arch/unix/x11/xaw/uiarch.h:34:28: error: X11/StringDefs.h: No such file or directory
In file included from ../../src/arch/unix/x11/xaw/videoarch.h:5,
from ../../src/arch/unix/videoarch.h:9,
from video-canvas.c:39:
So I Installed the libxt-dev package to fix the problem :
sudo apt-get install libxt-dev
Reading package lists... Done
Building dependency tree
Reading state information... Done
The following extra packages will be installed:
libice-dev libsm-dev
The following NEW packages will be installed:
libice-dev libsm-dev libxt-dev
0 upgraded, 3 newly installed, 0 to remove and 0 not upgraded.
Need to get 563kB of archives.
After unpacking 1675kB of additional disk space will be used.
Do you want to continue [Y/n]?
Then I ran again :
sudo make
And another error was reported :
FileSel.c:47:29: error: X11/Xaw/SimpleP.h: No such file or directory
FileSel.c:48:28: error: X11/Xaw/Simple.h: No such file or directory
FileSel.c:49:28: error: X11/Xaw/LabelP.h: No such file or directory
FileSel.c:50:27: error: X11/Xaw/Label.h: No such file or directory
FileSel.c:51:30: error: X11/Xaw/CommandP.h: No such file or directory
FileSel.c:52:29: error: X11/Xaw/Command.h: No such file or directory
FileSel.c:53:27: error: X11/Xaw/FormP.h: No such file or directory
FileSel.c:54:26: error: X11/Xaw/Form.h: No such file or directory
In file included from FileSelP.h:25,
from FileSel.c:71:
DirMgr.h:86: warning: function declaration isn't a prototype
In file included from FileSel.c:71:
FileSelP.h:27:31: error: X11/Xaw/Cardinals.h: No such file or directory
FileSel.c: In function ChildrenCreate:
FileSel.c:767: error: labelWidgetClass undeclared (first use in this function)
FileSel.c:767: error: (Each undeclared identifier is reported only once
FileSel.c:767: error: for each function it appears in.)
FileSel.c:805: error: commandWidgetClass undeclared (first use in this function)
make[7]: *** [FileSel.o] Error 1
make[7]: Leaving directory `/home/ubuntu/vice-1.21/src/arch/unix/x11/xaw/widgets'
make[6]: *** [all-recursive] Error 1
make[6]: Leaving directory `/home/ubuntu/vice-1.21/src/arch/unix/x11/xaw'
make[5]: *** [all-recursive] Error 1
make[5]: Leaving directory `/home/ubuntu/vice-1.21/src/arch/unix/x11'
make[4]: *** [all-recursive] Error 1
make[4]: Leaving directory `/home/ubuntu/vice-1.21/src/arch/unix'
make[3]: *** [all-recursive] Error 1
make[3]: Leaving directory `/home/ubuntu/vice-1.21/src/arch'
make[2]: *** [all-recursive] Error 1
make[2]: Leaving directory `/home/ubuntu/vice-1.21/src'
make[1]: *** [all] Error 2
make[1]: Leaving directory `/home/ubuntu/vice-1.21/src'
make: *** [all-recursive] Error 1
So I Installed libxaw7-dev and libxaw-headers packages :
sudo apt-get install libxaw7-dev libxaw-headers
ubuntu@horus:~/vice-1.21$ sudo apt-get install libxaw7-dev libxaw-headers
Reading package lists... Done
Building dependency tree
Reading state information... Done
The following extra packages will be installed:
libxmu-dev libxmu-headers libxpm-dev
The following NEW packages will be installed:
libxaw-headers libxaw7-dev libxmu-dev libxmu-headers libxpm-dev
0 upgraded, 5 newly installed, 0 to remove and 0 not upgraded.
Need to get 389kB of archives.
After unpacking 1577kB of additional disk space will be used.
Do you want to continue [Y/n]?
Then I ran again :
sudo make
that finished without errors. So I ran :
sudo make install
I started the emulator via the x64 command to my surprise the screen was always black, If i pressed the left mouse button or the right button a menu appeared but the screeen was always black.
After googling a little I found the solution :
Just a simple change (a 0 for a 1) in the file :
vice-1.21/src/arch/unix/x11/xaw/uicolor.c
So I changed the line :
im = XCreateImage(display, visual, x11ui_get_display_depth(),
ZPixmap, 0, (char *)data, 1, 1, 8, 1);
for :
im = XCreateImage(display, visual, x11ui_get_display_depth(),
ZPixmap, 0, (char *)data, 1, 1, 8, 0);
Then I recompiled again with :
sudo make
then
sudo make install
Then the program worked!!!
Thanks to the open source it was posible to fix the game and play ASYLUM!!!
This is one of the benefits of having the code!!!
Here the screen with the compiling console, gedit with the source, and Asylum (a C64 Adventure Game) !!!
For those who don't know the Asylum game here is a link with the D64 disk image :
http://www.retrosite.de/adventure/asylum/asylum.html
Please, remember don't look up in Asylum!!! ;-)
Monday, 28 May 2007
Ubuntu Installed Grub - Bye Solaris 10!
As usual Solaris suffered when I tried others operating systems.
One of the most common causes of the Solaris destruction is the fact that the Solaris partition ID is 0x82 (the same as the Linux Swap partition). So if you boot from a Live CD (like Ubuntu) it will automatically assign your Solaris partition as a Swap... Yes!!! without a prompt!!! so it will destroy the Solaris installation!.
Later with Solaris 10 Sun changed the partition ID for 0xbf to avoid this problem.
Another problem is the modified grub that Solaris uses.
As you can read in another post I finally decided to install Ubuntu. I have one hard disk with :
Windows XP (that came with the laptop), PC-BSD 1.3.2, Solaris 10, and Slackware 11 (now Ubuntu 7.04).
I have 4 primary partitions :
Windows - Partition 0
Slackware 11 - Partition 1
PC-BSD - Partition 2
Solaris - Partition 3
I was using LILO in my MBR (Master Boot Record / Partition Table). When I Installed Ubuntu over the Slackware partition, it also installed the grub in the MBR. The problem was that I couldn't boot Solaris again.
Yes... I modified the menu.lst of the grub in Ubuntu hundres of times, but nothing worked... I only got different errors messages : Invalid Partition, Filesystem type unknown, etc.
Finally I decided to search in the Sun Web Site and I found the following :
http://www.sun.com/bigadmin/features/articles/grub_boot_solaris.html
GRUB as obtained from sources other than Sun does not currently recognize Solaris on-disk VTOC and UFS formats. Sun has submitted changes to the GRUB project to support this; until they have been integrated, only the Solaris GRUB will work. If Linux installed GRUB on the master boot block, you will not be able to get to the Solaris OS even if you make the Solaris partition the active partition. In this case, you can chainload from the Linux GRUB by modifying the menu on Linux. Alternatively, you can replace the master boot sector with the Solaris GRUB in the above example, by using the installgrub(1M) command:
installgrub -m /boot/grub/stage1 /boot/grub/stage2 /dev/rdsk/c0t2d0s3
Before the Solaris VTOC and UFS implementation is propagated to the standard GRUB release, only the Solaris version of GRUB will work.I tried the installgrub command booting from the Install DVD and selecting option 6. But I only got an error message : /dev/dsk/c0t0d0 : Not a character device. I tried with rdsk and another disk number but neither worked.
So I reinstalled Solaris again. But when I click "Finish" and the system rebooted the Ubuntu Grub menu appears... I was expecting the Solaris grub... what happend??
I don't really know but maybe Solaris got confused with ubuntu's grub in the MBR.
So I had to use and old 3 1/2" diskette with DOS and a Norton Disk Editor 4. I booted DOS ran DE and selected the hard disk as physical disk and saved the MBR in a file. Just to have a backup of the MBR!
Then I booted from the Windows XP CD and used the recovery console and ran the FIXMBR command (with my fingers crossed).
It deleted ubuntu's grub from the MBR.
Then I Rebooted and installed again Solaris. Without the Ubuntu Grub, the Solaris installation wrote the MBR with its grub.
Then I was able to boot Solaris 10 and modified the menu.lst in Solaris with the following :
------------
title Solaris 10 11/06 s10x_u3wos_10 x86
root (hd0,3,a)
kernel /plataform/i86pc/multiboot
module /plataform/i86pc/boot_archive
title ubuntu, Kernel 2.6.20-15-generic
root (hd0,1)
kernel /boot/vmlinuz-2.6.20-15-generic root=UUID=b98c9312-17fb-4e5b-8459-7d4008a8858d ro quiet splash
initrd /boot/initrd.img-2.6.20-15-generic
quiet
savedefault
title ubuntu, Kernel 2.6.20-15-generic (recovery mode)
root (hd0,1)
kernel /boot/vmlinuz-2.6.20-15-generic root=UUID=b98c9312-17fb-4e5b-8459-7d4008a8858d ro single
initrd /boot/initrd.img-2.6.20-15-generic
title PC-BSD 1.3.2
rootnoverify (hd0,2)
chainload +1
title Windows XP
rootnoverify (hd0,0)
chainload +1
---------

Now I finally can boot Solaris and the others OS again...
Why does my Solaris always get hurt???
Thursday, 24 May 2007
Installing Ubuntu 7.04 on a Compaq Presario 1500 Notebook
Finally I decided to try again the Ubuntu 7.04 live cd. Now I'm using Ubuntu... so... I'm Finally a Human Being!!!
I booted and selected the "Start or install Ubuntu" option.
When the screen showed a garbled display I pressed "crtl-alt-f2" and ran the command :
sudo dpkg-reconfigure xserver-xorg
Then I chose the following options :
Attempt to autodetect video hardware? : "Yes"
X server driver : "ati"
Identifier for your video card : "ATI Technologies Inc Radeon Mobility M7 LW [Radeon Mobility 7500]"
Video card's Bus identifier : "PCI:1:0:0"
Amount of memory (KB) to be used by the video card : "32768"
Use Kernel Framebuffer device interface : "Yes"
Then a few questions about the Keyboard & mouse
Write default files section to configuration file ? : "Yes"
Attempt Monitor Autodetection ? : "Yes"
Identifier for the monitor : "Generic Monitor"
Video Modes to be used by the X server : "1400 x 1050"
Method for selecting the monitor characteristics ? : "Medium"
Resolution : "1400x1050 @ 60Hz"
Write monitor sync ranges to the configuration file : "Yes"
Desired default color depth in bits : "16"
Then I returned to the console usign the crtl-alt-F7
And pressed the ctrl-alt-backspace twice. Then the gnome restarted with a 1400x1050 @ 60Hz resolution without problem.
I installed the distribution and rebooted.
Then I opened a terminal and I edited manually the /etc/X11/xorg.conf file.
In the following link you can download my xorg.conf.
http://aleks.vigio.pl/?lang=spain&page=show&id=256
The glxgears shows an average of 1000fps.
I pressed the button "Enable Desktop Effect" and activate the options :
"Windows Wobble when Moved"
"Workspaces on a Cube"
But the cube effect didn't work until I ran the following two commands :
gconftool-2 --type int --set /apps/compiz/general/screen0/options/hsize 4
gconftool-2 --type int --set /apps/compiz/general/screen0/options/number_of_desktops 1
Then I pressed the ctrl+alt+left or the ctrl+alt+

Tuesday, 15 May 2007
Is Ubuntu not for ati mobility beings???


I reset and choose the "Start Ubuntu in safe graphics mode" and I got this funny output :

Anyway, now I could boot the Dapper Drake with a -19569 Hz frequency and I'm reaching the limits of the reality and the universe...


