Friday 29 June 2007

Installing Ubuntu 7.04 Feisty Fawn on Compaq Presario 1500US

Installing Ubuntu 7.04 Feisty Fawn on Compaq Presario 1500US

Last updated: June 29, 2007

General Hardware Specifications of Compaq Presario 1500US:

Hardware Components
Status under Linux
Notes
Pentium IV Processor, 2.4 GHzWorksTo make CPU Frequency Scaling work you must manually edit the file : /etc/modules and add p4-clockmod after installing ubuntu.
14.1 SXGA+ TFT DisplayWorksSee instructions below
ATI Mobility Radeon 7500 (M7) - 32MB VideoWorksSee instructions below
512MB, DDR SDRAM, 2DIMMsWorksNo special procedure required during installation
TOSHIBA MK4018GAP (40 GB, 4200 RPM, Ultra-ATA/100) Hard DriveWorksNo special procedure required during installation
Internal Floppy DriveWorksNo special procedure required during installation
Integrated Network Card - Intel(R) PRO/100 VEWorksNo special procedure required during installation
Internal 56k Modem - SoftV92 - Harmonics (Conexant) HSF 56k HSFi ModemWorks only in 14400 baudsYou must install the proprietary HSF driver from Linuxant. Free version works only in 14400 bauds. Full version with 56K support for USD 19
TOSHIBA DVD-ROM SD-R2102 (DVD:8x, CD:8x/8x/24x DVD-ROM/CD-RW)WorksNo special procedure required during installation
SoundMAX Integrated Digital Audio - Intel 82801CA ICH3-S - AC'97 Audio ControllerWorksNo special procedure required during installation
Lithium-Ion BatteryWorksNo special procedure required during installation


This laptop is now operating under Kernel version 2.6.20-16-generic

Basic Installation of Ubuntu 7.04 Feisty Fawn :
  • Why use Ubuntu :
    I always used Slackware in this laptop (I tested other distributions too) but I decided to test Ubuntu because a lot of people are talking about this distribution and has superb forums.
    According to distrowatch is the most popular linux distribution!
  • Obtaining Ubuntu :
    You can download Ubuntu from the site :
    Ubuntu Download
    Select the : Standard personal computer (x86 architecture) version.
    Afterwards burn the live-cd, insert it in the cdrom and reboot the notebook.
  • Installing :
    After the computer reboots you will see a menu with a few options :
    Select :
    "Start or install Ubuntu"

    Configuring the video display

    After a few seconds you will see a garbled display.
    Here a photo :


    Then you must press "crtl-alt-f2" and run the command :

    sudo dpkg-reconfigure xserver-xorg

    Then you have to choose the following options :

    Attempt to autodetect video hardware? : "Yes"
    X server driver : "ati"
    Identifier for your video card : "ATI Technologies Inc Radeon Mobility M7 LW [Radeon Mobility 7500]"
    Video card's Bus identifier : "PCI:1:0:0"
    Amount of memory (KB) to be used by the video card : "32768"
    Use Kernel Framebuffer device interface : "Yes"
    Then a few questions about the Keyboard & mouse
    Write default files section to configuration file ? : "Yes"
    Attempt Monitor Autodetection ? : "Yes"
    Identifier for the monitor : "Generic Monitor"
    Video Modes to be used by the X server : "1400 x 1050"
    Method for selecting the monitor characteristics ? : "Medium"
    Resolution : "1400x1050 @ 60Hz"
    Write monitor sync ranges to the configuration file : "Yes"
    Desired default color depth in bits : "16"

    Then return to the gnome session usign the crtl-alt-F7

    And press the ctrl-alt-backspace twice. Then the gnome will restart with a 1400x1050 @ 60Hz resolution without problem.

    Then from the system menu select Install Ubuntu.
    Partition the hard disk (if need) and continue the installation.

  • Post-Install modifications/tweaks
    After reboot open a terminal and edit manually the /etc/X11/xorg.conf file with the command :
    sudo gedit /etc/X11/xorg.conf
    And modify the file as show below :

    Section "Device"
    Identifier "ATI RADEON 7500"
    Driver "radeon"
    BusID "PCI:1:0:0"
    VideoRam 32768
    Option "AGPMode" "4"
    Option "AGPSize" "32"
    Option "XAANoOffscreenPixmaps"
    Option "DRI" "true"
    Option "AGPFastWrite" "true"
    Option "EnablePageFlip" "true"
    EndSection

    Section "Monitor"
    Identifier "Generic Monitor"
    Option "DPMS"
    HorizSync 30-81
    VertRefresh 56-75
    EndSection

    Section "Screen"
    Identifier "Default Screen"
    Device "ATI RADEON 7500"
    Monitor "Generic Monitor"
    DefaultDepth 16
    SubSection "Display"
    Depth 1
    Modes "1400x1050"
    EndSubSection
    SubSection "Display"
    Depth 4
    Modes "1400x1050"
    EndSubSection
    SubSection "Display"
    Depth 8
    Modes "1400x1050"
    EndSubSection
    SubSection "Display"
    Depth 15
    Modes "1400x1050"
    EndSubSection
    SubSection "Display"
    Depth 16
    Modes "1400x1050"
    EndSubSection
    SubSection "Display"
    Depth 24
    Modes "1400x1050"
    EndSubSection
    EndSection

    Section "DRI"
    Mode 0666
    EndSection

    Section "Extensions"
    Option "Composite" "Enable"
    EndSection


    With these settings you will have a 1000 fps according to the glxgears command.

    Afterwards you can activate the desktop effect. Just go to the menu : System->Preferences and select "Desktop Effect" then press the button "Enable Desktop Effect" and activate the options :
    "Windows Wobble when Moved"
    "Workspaces on a Cube"

    Then in a terminal run the following commands :

    gconftool-2 --type int --set /apps/compiz/general/screen0/options/hsize 4

    gconftool-2 --type int --set /apps/compiz/general/screen0/options/number_of_desktops 1


    Then you can press the ctrl+alt+left arrow or the ctrl+alt+Button1 mouse and the cube should work!!!

Setting up additional features for Ubuntu 7.04 Feisty Fawn


  • Making CPU Frequency Scaling work for you

    If you press the right mouse buttom over the taskbar (the panel) and select "Add to panel" you will see many applets and if you select the CPU Frequency Applet, you will get an error message saying CPU Frequency Scaling is not Supported.
    In order to make it work you must open a terminal an run the command :
    sudo gedit /etc/modules
    And add the following line at the end of the file :
    p4-clockmod

    In order to test it you can run the following commands :
    sudo modprobe p4-clockmod
    sudo powernowd

    You should get an output similar to this :
    powernowd: PowerNow Daemon v0.97, (c) 2003-2006 John Clemens
    powernowd: Found 1 scalable unit: -- 1 'CPU' per scalable unit
    powernowd: cpu0: 300Mhz - 2400Mhz (8 steps)

  • Getting connected using the modem
    I made the modem work using the driver from Linuxant, I couldn't find an open source driver for it.
    According to Linuxant site :
    This cannot be effectively done by the open-source community because a significant portion of such drivers is technology protected by trade secrets, patents, or other restrictions, and it requires a NDA (Non-Disclosure Agreement) which most open-source developers are not willing or not able to sign without getting into a difficult position.

    So basically you must download the driver from their site :
    Linuxant Download for Ubuntu
    Select the file :
    hsfmodem_7.60.00.09full_k2.6.20_16_generic_ubuntu_i386.deb.zip
    Be carefull to download the correct version of the driver, it depends of the kernel you are using.
    You can obtain your kernel version with the command :
    uname -r
    After install the package you could run the command :
    wvdial
    and then manually edit the file /etc/wvdial.conf
    sudo gedit /etc/wvdial.conf
    and add the following lines :

    [Modem0]
    Modem = /dev/modem
    Baud = 115200
    Init1 = ATZ
    Init2 = ATQ0 V1 E1 S0=0 &C1 &D2 +FCLASS=0
    SetVolume = 1
    Dial Command = ATDT
    Init4 = ATM1L3


    [Dialer Defaults]
    Init1 = ATZ
    Init2 = ATQ0 V1 E1 S0=0 &C1 &D2 +FCLASS=0
    Modem Type = Analog Modem
    Baud = 115200
    New PPPD = yes
    Modem = /dev/modem
    ISDN = 0
    SetVolume = 1
    Dial Command = ATDT
    Init4 = ATM1L3
    ; Phone =
    ; Password =
    ; Username =

    [Dialer ppp0]
    Username = alternativa
    Password = gratis
    Phone = 55555555
    Inherits = Dialer Defaults
    Stupid mode = 1


    As you can see I used the username, password and telephone number of a free ISP here in Buenos Aires, Argentina (replace with your ISP data).
    After that you can test the connection using the command :
    wvdial ppp0
    Here is the output :
    --> WvDial: Internet dialer version 1.56
    --> Initializing modem.
    --> Sending: ATZ
    ATZ
    OK
    --> Sending: ATQ0 V1 E1 S0=0 &C1 &D2 +FCLASS=0
    ATQ0 V1 E1 S0=0 &C1 &D2 +FCLASS=0
    OK
    --> Sending: ATM1L3
    ATM1L3
    OK
    --> Modem initialized.
    --> Sending: ATDT55555555
    --> Waiting for carrier.
    ATDT55555555
    CONNECT 115200
    --> Carrier detected. Starting PPP immediately.
    --> Starting pppd at Thu Jun 28 21:31:15 2007
    --> Pid of pppd: 8812
    --> Using interface ppp0
    --> pppd: [08][01][06][08][08][02][06][08]
    --> pppd: [08][01][06][08][08][02][06][08]
    --> pppd: [08][01][06][08][08][02][06][08]
    --> pppd: [08][01][06][08][08][02][06][08]
    --> pppd: [08][01][06][08][08][02][06][08]
    --> local IP address xxx.xxx.xx.xxx
    --> pppd: [08][01][06][08][08][02][06][08]
    --> remote IP address xxx.xx.xxx.xxx
    --> pppd: [08][01][06][08][08][02][06][08]
    --> primary DNS address xxx.xx.xxx.x
    --> pppd: [08][01][06][08][08][02][06][08]
    --> secondary DNS address xxx.xxx.xxx.xx
    --> pppd: [08][01][06][08][08][02][06][08]


    After that you will be able to browse the web at 14400bps. Here is a picture of my test :


    Notice that you will see in the panel (taskbar) a message of restricted driver "Conexant modem engine".
  • Installing lm-sensors to monitor CPU temperature
    Here is an extract of my more detailed explanation located at :
    Installing lm-sensors on Presario 1500

    First you must install the lm-sensors package :
    sudo apt-get install lm-sensors

    Then you must download the script "unhide_ICH_SMBus" that show the chip/sensor :
    Here the link :
    unhide_ICH_SMBus

    Remember to make the file executable using the chmod +x
    Then run the script :
    ubuntu@horus:~$ sudo ./unhide_ICH_SMBus
    Password:
    Enabling SMBus PCI device ...
    Rescanning the bus ...
    Loading i2c-i801 ...
    00:1f.3 SMBus: Intel Corporation 82801CA/CAM SMBus Controller (rev 02)
    Done!

    After that you must execute :
    sudo sensors-detect
    Then the program will show you the following lines :

    To make the sensors modules behave correctly, add these lines to
    /etc/modules:

    #----cut here----
    # I2C adapter drivers
    i2c-i801
    # Chip drivers
    adm1031
    eeprom
    #----cut here----

    Do you want to add these lines to /etc/modules automatically? (yes/NO)

    Select "Yes".

    To make the sensors work in every boot you have to run the unhide_ICH_SMBus first.
    In order to run the command in every boot I edited the file /etc/init.d/rc.local:
    sudo gedit /etc/init.d/rc.local
    Then I added the line calling unhide_ICH_SMBus first :

    #! /bin/sh

    PATH=/sbin:/bin:/usr/sbin:/usr/bin
    [ -f /etc/default/rcS ] && . /etc/default/rcS
    . /lib/lsb/init-functions

    do_start() {
    if [ -x /etc/rc.local ]; then
    log_begin_msg "Running local boot scripts (/etc/rc.local)"
    /etc/rc.local
    log_end_msg $?
    /home/ubuntu/unhide_ICH_SMBus
    fi
    }

    case "$1" in
    start)
    do_start
    ;;
    restart|reload|force-reload)
    echo "Error: argument '$1' not supported" >&2
    exit 3
    ;;
    stop)
    ;;
    *)
    echo "Usage: $0 start|stop" >&2
    exit 3
    ;;
    esac


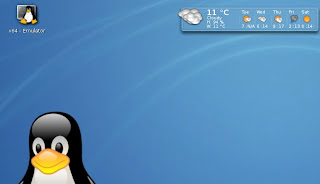
    Afterwards you can download an applet to show the temperature in the panel :
    Computer Temp 0.9.6.1

    You can install it with a simple double-click and after that you can right click in the panel (taskbar) and select "Add to panel" then browse to "System and Hardware" and select "Computer temperature monitor".

    Here is a picture with the Temperature and CPU frequency monitors in the panel :

Unsolved issues
  • Free modem driver to work in 56K and with faxing capabilities
  • Test the S-Video Out function
Configuration Files

  • /etc/X11/xorg.conf
    # /etc/X11/xorg.conf (xorg X Window System server configuration file)
    #
    # This file was generated by dexconf, the Debian X Configuration tool, using
    # values from the debconf database.
    #
    # Edit this file with caution, and see the xorg.conf(5) manual page.
    # (Type "man xorg.conf" at the shell prompt.)
    #
    # This file is automatically updated on xserver-xorg package upgrades *only*
    # if it has not been modified since the last upgrade of the xserver-xorg
    # package.
    #
    # If you have edited this file but would like it to be automatically updated
    # again, run the following command:
    # sudo dpkg-reconfigure -phigh xserver-xorg

    Section "Files"
    FontPath "/usr/share/fonts/X11/misc"
    FontPath "/usr/share/fonts/X11/cyrillic"
    FontPath "/usr/share/fonts/X11/100dpi/:unscaled"
    FontPath "/usr/share/fonts/X11/75dpi/:unscaled"
    FontPath "/usr/share/fonts/X11/Type1"
    FontPath "/usr/share/fonts/X11/100dpi"
    FontPath "/usr/share/fonts/X11/75dpi"
    # path to defoma fonts
    FontPath "/var/lib/defoma/x-ttcidfont-conf.d/dirs/TrueType"
    EndSection

    Section "Module"
    Load "bitmap"
    Load "ddc"
    Load "dri"
    Load "extmod"
    Load "freetype"
    Load "glx"
    Load "int10"
    Load "vbe"
    EndSection

    Section "InputDevice"
    Identifier "Generic Keyboard"
    Driver "kbd"
    Option "CoreKeyboard"
    Option "XkbRules" "xorg"
    Option "XkbModel" "pc105"
    Option "XkbLayout" "us"
    EndSection

    Section "InputDevice"
    Identifier "Configured Mouse"
    Driver "mouse"
    Option "CorePointer"
    Option "Device" "/dev/input/mice"
    Option "Protocol" "ImPS/2"
    Option "ZAxisMapping" "4 5"
    Option "Emulate3Buttons" "true"
    EndSection

    Section "InputDevice"
    Identifier "Synaptics Touchpad"
    Driver "synaptics"
    Option "SendCoreEvents" "true"
    Option "Device" "/dev/psaux"
    Option "Protocol" "auto-dev"
    Option "HorizScrollDelta" "0"
    EndSection

    Section "InputDevice"
    Driver "wacom"
    Identifier "stylus"
    Option "Device" "/dev/input/wacom"
    Option "Type" "stylus"
    Option "ForceDevice" "ISDV4" # Tablet PC ONLY
    EndSection

    Section "InputDevice"
    Driver "wacom"
    Identifier "eraser"
    Option "Device" "/dev/input/wacom"
    Option "Type" "eraser"
    Option "ForceDevice" "ISDV4" # Tablet PC ONLY
    EndSection

    Section "InputDevice"
    Driver "wacom"
    Identifier "cursor"
    Option "Device" "/dev/input/wacom"
    Option "Type" "cursor"
    Option "ForceDevice" "ISDV4" # Tablet PC ONLY
    EndSection

    Section "Device"
    Identifier "ATI RADEON 7500"
    Driver "radeon"
    BusID "PCI:1:0:0"
    VideoRam 32768
    Option "AGPMode" "4"
    Option "AGPSize" "32"
    Option "XAANoOffscreenPixmaps"
    Option "DRI" "true"
    Option "AGPFastWrite" "true"
    Option "EnablePageFlip" "true"
    EndSection

    Section "Monitor"
    Identifier "Generic Monitor"
    Option "DPMS"
    HorizSync 30-81
    VertRefresh 56-75
    EndSection

    Section "Screen"
    Identifier "Default Screen"
    Device "ATI RADEON 7500"
    Monitor "Generic Monitor"
    DefaultDepth 16
    SubSection "Display"
    Depth 1
    Modes "1400x1050"
    EndSubSection
    SubSection "Display"
    Depth 4
    Modes "1400x1050"
    EndSubSection
    SubSection "Display"
    Depth 8
    Modes "1400x1050"
    EndSubSection
    SubSection "Display"
    Depth 15
    Modes "1400x1050"
    EndSubSection
    SubSection "Display"
    Depth 16
    Modes "1400x1050"
    EndSubSection
    SubSection "Display"
    Depth 24
    Modes "1400x1050"
    EndSubSection
    EndSection

    Section "ServerLayout"
    Identifier "Default Layout"
    Screen "Default Screen"
    InputDevice "Generic Keyboard"
    InputDevice "Configured Mouse"
    InputDevice "stylus" "SendCoreEvents"
    InputDevice "cursor" "SendCoreEvents"
    InputDevice "eraser" "SendCoreEvents"
    InputDevice "Synaptics Touchpad"
    EndSection

    Section "DRI"
    Mode 0666
    EndSection

    Section "Extensions"
    Option "Composite" "Enable"
    EndSection


  • /etc/modules
    # /etc/modules: kernel modules to load at boot time.
    #
    # This file contains the names of kernel modules that should be loaded
    # at boot time, one per line. Lines beginning with "#" are ignored.

    fuse
    lp
    sbp2

    # Generated by sensors-detect on Thu Jun 14 21:25:02 2007
    # I2C adapter drivers
    i2c-i801
    # Chip drivers
    adm1031
    eeprom

    p4-clockmod


  • /etc/wvdial.conf

    [Modem0]
    Modem = /dev/modem
    Baud = 115200
    Init1 = ATZ
    Init2 = ATQ0 V1 E1 S0=0 &C1 &D2 +FCLASS=0
    SetVolume = 1
    Dial Command = ATDT
    Init4 = ATM1L3

    [Dialer Defaults]
    Init1 = ATZ
    Init2 = ATQ0 V1 E1 S0=0 &C1 &D2 +FCLASS=0
    Modem Type = Analog Modem
    Baud = 115200
    New PPPD = yes
    Modem = /dev/modem
    ISDN = 0
    SetVolume = 1
    Dial Command = ATDT
    Init4 = ATM1L3
    ; Phone =
    ; Password =
    ; Username =

    [Dialer ppp0]
    Username = alternativa
    Password = gratis
    Phone = 55555555
    Inherits = Dialer Defaults
    Stupid mode = 1

More Specific Information
  • lspci

    root@horus:/home/ubuntu# lspci
    00:00.0 Host bridge: Intel Corporation 82845 845 (Brookdale) Chipset Host Bridge (rev 04)
    00:01.0 PCI bridge: Intel Corporation 82845 845 (Brookdale) Chipset AGP Bridge (rev 04)
    00:1e.0 PCI bridge: Intel Corporation 82801 Mobile PCI Bridge (rev 42)
    00:1f.0 ISA bridge: Intel Corporation 82801CAM ISA Bridge (LPC) (rev 02)
    00:1f.1 IDE interface: Intel Corporation 82801CAM IDE U100 (rev 02)
    00:1f.3 SMBus: Intel Corporation 82801CA/CAM SMBus Controller (rev 02)
    00:1f.5 Multimedia audio controller: Intel Corporation 82801CA/CAM AC'97 Audio Controller (rev 02)
    01:00.0 VGA compatible controller: ATI Technologies Inc Radeon Mobility M7 LW [Radeon Mobility 7500]
    02:04.0 Communication controller: Conexant HSF 56k HSFi Modem (rev 01)
    02:05.0 FireWire (IEEE 1394): Texas Instruments TSB43AB22/A IEEE-1394a-2000 Controller (PHY/Link)
    02:06.0 CardBus bridge: Texas Instruments PCI1410 PC card Cardbus Controller (rev 02)
    02:08.0 Ethernet controller: Intel Corporation 82801CAM (ICH3) PRO/100 VE (LOM) Ethernet Controller (rev 42)
    02:0e.0 USB Controller: NEC Corporation USB (rev 41)
    02:0e.1 USB Controller: NEC Corporation USB (rev 41)
    02:0e.2 USB Controller: NEC Corporation USB 2.0 (rev 02)
    03:00.0 USB Controller: NEC Corporation USB (rev 43)
    03:00.1 USB Controller: NEC Corporation USB (rev 43)
    03:00.2 USB Controller: NEC Corporation USB 2.0 (rev 04)
Links:

This laptop works very well. I have been using it for four years with many operating systems without hardware problems.
The only problem is its tendency to overheat. So you have to clean it with compressed air every 6 months.

Friday 15 June 2007

Installing lm-sensors on a Presario 1500

I continue configuring and tweaking my ubuntu 7.04 Feisty Fawn on my Compaq presario 1500US.
Yesterday I configured the lm-sensors package in order to install a desklet or an application to see the current motherboard temperature. Because this laptop has a tendency to overheat! (see my other post :
Notebook overheat problem or Frying Eggs on Presario 1500)

First of all I launched Synaptic and searched "lm-sensors" and installed the package without problem.
(another option is to run in a terminal : sudo apt-get install lm-sensors)
Then I Ran the command :
sudo sensors-detect
and I obtained the following text :

ubuntu@horus:~$ sudo sensors-detect
Password:
# sensors-detect revision 4171 (2006-09-24 03:37:01 -0700)

This program will help you determine which kernel modules you need
to load to use lm_sensors most effectively. It is generally safe
and recommended to accept the default answers to all questions,
unless you know what you're doing.

We can start with probing for (PCI) I2C or SMBus adapters.
Do you want to probe now? (YES/no): yes
Probing for PCI bus adapters...
Sorry, no known PCI bus adapters found.

We will now try to load each adapter module in turn.
If you have undetectable or unsupported adapters, you can have them
scanned by manually loading the modules before running this script.

To continue, we need module `i2c-dev' to be loaded.
Do you want to load `i2c-dev' now? (YES/no): yes
Module loaded successfully.

We are now going to do the I2C/SMBus adapter probings. Some chips may
be double detected; we choose the one with the highest confidence
value in that case.
If you found that the adapter hung after probing a certain address,
you can specify that address to remain unprobed.

Some chips are also accessible through the ISA I/O ports. We have to
write to arbitrary I/O ports to probe them. This is usually safe though.
Yes, you do have ISA I/O ports even if you do not have any ISA slots!
Do you want to scan the ISA I/O ports? (YES/no): yes
Probing for `National Semiconductor LM78' at 0x290... No
Probing for `National Semiconductor LM78-J' at 0x290... No
Probing for `National Semiconductor LM79' at 0x290... No
Probing for `Winbond W83781D' at 0x290... No
Probing for `Winbond W83782D' at 0x290... No
Probing for `Winbond W83627HF' at 0x290... No
Probing for `Silicon Integrated Systems SIS5595'... No
Probing for `VIA VT82C686 Integrated Sensors'... No
Probing for `VIA VT8231 Integrated Sensors'... No
Probing for `AMD K8 thermal sensors'... No
Probing for `IPMI BMC KCS' at 0xca0... No
Probing for `IPMI BMC SMIC' at 0xca8... No

Some Super I/O chips may also contain sensors. We have to write to
standard I/O ports to probe them. This is usually safe.
Do you want to scan for Super I/O sensors? (YES/no): yes
Probing for Super-I/O at 0x2e/0x2f
Trying family `ITE'... Yes
Found unknown chip with ID 0xea11
Trying family `National Semiconductor'... Yes
Found `Nat. Semi. PC8739x Super IO'
(no hardware monitoring capabilities)
Trying family `SMSC'... Yes
Found unknown chip with ID 0xea11
Trying family `VIA/Winbond/Fintek'... Yes
Found unknown chip with ID 0xea11
Probing for Super-I/O at 0x4e/0x4f
Trying family `ITE'... No
Trying family `National Semiconductor'... No
Trying family `SMSC'... No
Trying family `VIA/Winbond/Fintek'... No

Sorry, no sensors were detected.
Either your sensors are not supported, or they are connected to an
I2C or SMBus adapter that is not supported. See doc/FAQ,
doc/lm_sensors-FAQ.html or http://www.lm-sensors.org/wiki/FAQ
(FAQ #4.24.3) for further information.
If you find out what chips are on your board, check
http://www.lm-sensors.org/wiki/Devices for driver status.


So, basically the sensors package didn't detect the sensors.
I read an installation instruction and ran the commands :
sudo gedit makedev.sh
Copy the next lines :

#!/bin/bash
# Here you can set several defaults.
# The number of devices to create (max: 256)
NUMBER=32

# The owner and group of the devices
OUSER=root
OGROUP=root
# The mode of the devices
MODE=600

# This script doesn't need to be run if devfs is used
if [ -r /proc/mounts ] ; then
if grep -q "/dev devfs" /proc/mounts ; then
echo "You do not need to run this script as your system uses devfs."
exit;
fi
fi

i=0;

while [ $i -lt $NUMBER ] ; do
echo /dev/i2c-$i
mknod -m $MODE /dev/i2c-$i c 89 $i exit
chown "$OUSER:$OGROUP" /dev/i2c-$i exit
i=$[$i + 1]
done
#end of file


Then :

sudo chmod +x makedev.sh
sudo ./makedev.sh

Afterwards I ran again sensors-detect but nothing changed... then I remembered that in my M$ Windows I used the motherboard monitor and later the speedfan so I booted M$ Windows and obtained the Speedfan output :

Win9x:NO 64Bit:NO GiveIO:YES SpeedFan:YES
I/O properly initialized
Linked ISA BUS at $0290
SMBus successfully enabled
Linked Intel 82801CAM ICH3 SMBUS at $1200
Scanning ISA BUS at $0290...
SuperIO Chip=PC8739x
Scanning Intel SMBus at $1200...
ADM1031 (ID=$31) found on SMBus at $2C
SMART Enabled for drive 0
Found TOSHIBA MK4018GAP (40,0GB)
Found ACPI temperature (59,0C)
End of detection


After that I found out the chip/sensor for my laptop an Intel 82801CAM ICH3 with an ADM1031. So I checked the www.lm-sensors.org and found that that chip/sensor is supported.
After searching and trying many things I finally found the script "unhide_ICH_SMBus" that show my chip/sensor :
You can download it from :
unhide_ICH_SMBus

Just in case here is the script (you can cut and paste using the gedit) :


#!/bin/bash
# (C) Rudolf Marek ,
# Jean Delvare
#
# Thanks Jean Delvare and Oliver Dreier for testing.
#
# This program is free software; you can redistribute it and/or modify
# it under the terms of the GNU General Public License version 2
# as published by the Free Software Foundation

pcibus="/sys/bus/pci/slots/"
device="00:1f"

if [ "$UID" -ne 0 ] ; then
echo "You need to be root to run this script!"
exit 252
fi

smbus=`lspci -n -s $device.3 grep -i '0c05: *8086'`
if [ -n "$smbus" ] ; then
echo "ICH SMBus is already there!"
lspci -s $device.3
exit
fi

intel=`lspci -n -s $device.0 grep 8086`

if [ -z "$intel" ] ; then
echo "Not for your chipset - Intel (ICH) only"
exit 255;
fi
modprobe fakephp &> /dev/null

if [ ! -d "$pcibus" ] ; then
echo "You need the fake PCI hotplug driver! (fakephp.ko and 2.6 kernel)"
exit 255;
fi

echo "Enabling SMBus PCI device ..."

newval=$( printf '%x' $((0x$(setpci -s $device.0 f2.w) & 0xfff7)))
setpci -s $device.0 f2.w=$newval

echo "Rescanning the bus ..."
echo 1 > $pcibus/0000:$device.0/power 2>/dev/null
if [ ! -d "$pcibus/0000:$device.3" ] ; then
echo "Failed to enable the SMBUS"
exit 253;
fi

if [ ! -d "/sys/bus/pci/drivers/i801_smbus" ] ; then
echo "Loading i2c-i801 ..."
modprobe i2c-i801
if [ $? -ne 0 ] ; then
exit 251
fi
fi

lspci -s $device.3
echo "Done!"


-----------------------------
I ran the script :
ubuntu@horus:~$ sudo ./unhide_ICH_SMBus
Password:
Enabling SMBus PCI device ...
Rescanning the bus ...
Loading i2c-i801 ...
00:1f.3 SMBus: Intel Corporation 82801CA/CAM SMBus Controller (rev 02)
Done!


Afterwards I ran again :
sudo sensors-detect
And this time it ran Ok.
Here the output :

ubuntu@horus:~$ sudo sensors-detect
Password:
# sensors-detect revision 4171 (2006-09-24 03:37:01 -0700)

This program will help you determine which kernel modules you need
to load to use lm_sensors most effectively. It is generally safe
and recommended to accept the default answers to all questions,
unless you know what you're doing.

We can start with probing for (PCI) I2C or SMBus adapters.
Do you want to probe now? (YES/no): yes
Probing for PCI bus adapters...
Use driver `i2c-i801' for device 0000:00:1f.3: Intel 82801CA/CAM ICH3

We will now try to load each adapter module in turn.
Module `i2c-i801' already loaded.
If you have undetectable or unsupported adapters, you can have them
scanned by manually loading the modules before running this script.

To continue, we need module `i2c-dev' to be loaded.
Do you want to load `i2c-dev' now? (YES/no): yes
Module loaded successfully.

We are now going to do the I2C/SMBus adapter probings. Some chips may
be double detected; we choose the one with the highest confidence
value in that case.
If you found that the adapter hung after probing a certain address,
you can specify that address to remain unprobed.

Next adapter: SMBus I801 adapter at 1200
Do you want to scan it? (YES/no/selectively): yes
Client found at address 0x2c
Probing for `Myson MTP008'... No
Probing for `National Semiconductor LM78'... No
Probing for `National Semiconductor LM78-J'... No
Probing for `National Semiconductor LM79'... No
Probing for `National Semiconductor LM80'... No
Probing for `National Semiconductor LM85 or LM96000'... No
Probing for `Analog Devices ADM1027, ADT7460 or ADT7463'... No
Probing for `SMSC EMC6D100, EMC6D101 or EMC6D102'... No
Probing for `Analog Devices ADT7462'... No
Probing for `Analog Devices ADT7470'... No
Probing for `Analog Devices ADT7476'... No
Probing for `National Semiconductor LM87'... No
Probing for `National Semiconductor LM93'... No
Probing for `Winbond W83781D'... No
Probing for `Winbond W83782D'... No
Probing for `Winbond W83792D'... No
Probing for `Winbond W83793R/G'... No
Probing for `Winbond W83791SD'... No
Probing for `Winbond W83627HF'... No
Probing for `Winbond W83627EHF'... No
Probing for `Winbond W83627DHG'... No
Probing for `Asus AS99127F (rev.1)'... No
Probing for `Asus AS99127F (rev.2)'... No
Probing for `Asus ASB100 Bach'... No
Probing for `Genesys Logic GL518SM Revision 0x00'... No
Probing for `Genesys Logic GL518SM Revision 0x80'... No
Probing for `Genesys Logic GL520SM'... No
Probing for `Analog Devices ADM9240'... No
Probing for `Dallas Semiconductor DS1780'... No
Probing for `National Semiconductor LM81'... No
Probing for `Analog Devices ADM1026'... No
Probing for `Analog Devices ADM1025'... No
Probing for `Philips NE1619'... No
Probing for `Analog Devices ADM1024'... No
Probing for `Analog Devices ADM1029'... No
Probing for `Analog Devices ADM1030'... No
Probing for `Analog Devices ADM1031'... Success!
(confidence 7, driver `adm1031')
Probing for `Analog Devices ADM1022'... No
Probing for `Texas Instruments THMC50'... No
Probing for `ITE IT8712F'... No
Probing for `ALi M5879'... No
Probing for `SMSC LPC47M15x, LPC47M192 or LPC47M997'... No
Probing for `Winbond W83791D'... No
Client found at address 0x50
Probing for `Analog Devices ADM1033'... No
Probing for `Analog Devices ADM1034'... No
Probing for `SPD EEPROM'... Success!
(confidence 8, driver `eeprom')
Probing for `EDID EEPROM'... No
Probing for `Maxim MAX6900'... No
Client found at address 0x51
Probing for `Analog Devices ADM1033'... No
Probing for `Analog Devices ADM1034'... No
Probing for `SPD EEPROM'... Success!
(confidence 8, driver `eeprom')
Client found at address 0x69

Some chips are also accessible through the ISA I/O ports. We have to
write to arbitrary I/O ports to probe them. This is usually safe though.
Yes, you do have ISA I/O ports even if you do not have any ISA slots!
Do you want to scan the ISA I/O ports? (YES/no): yes
Probing for `National Semiconductor LM78' at 0x290... No
Probing for `National Semiconductor LM78-J' at 0x290... No
Probing for `National Semiconductor LM79' at 0x290... No
Probing for `Winbond W83781D' at 0x290... No
Probing for `Winbond W83782D' at 0x290... No
Probing for `Winbond W83627HF' at 0x290... No
Probing for `Silicon Integrated Systems SIS5595'... No
Probing for `VIA VT82C686 Integrated Sensors'... No
Probing for `VIA VT8231 Integrated Sensors'... No
Probing for `AMD K8 thermal sensors'... No
Probing for `IPMI BMC KCS' at 0xca0... No
Probing for `IPMI BMC SMIC' at 0xca8... No

Some Super I/O chips may also contain sensors. We have to write to
standard I/O ports to probe them. This is usually safe.
Do you want to scan for Super I/O sensors? (YES/no): yes
Probing for Super-I/O at 0x2e/0x2f
Trying family `ITE'... Yes
Found unknown chip with ID 0xea11
Trying family `National Semiconductor'... Yes
Found `Nat. Semi. PC8739x Super IO'
(no hardware monitoring capabilities)
Trying family `SMSC'... Yes
Found unknown chip with ID 0xea11
Trying family `VIA/Winbond/Fintek'... Yes
Found unknown chip with ID 0xea11
Probing for Super-I/O at 0x4e/0x4f
Trying family `ITE'... No
Trying family `National Semiconductor'... No
Trying family `SMSC'... No
Trying family `VIA/Winbond/Fintek'... No

Now follows a summary of the probes I have just done.
Just press ENTER to continue:

Driver `adm1031' (should be inserted):
Detects correctly:
* Bus `SMBus I801 adapter at 1200'
Busdriver `i2c-i801', I2C address 0x2c
Chip `Analog Devices ADM1031' (confidence: 7)

Driver `eeprom' (should be inserted):
Detects correctly:
* Bus `SMBus I801 adapter at 1200'
Busdriver `i2c-i801', I2C address 0x50
Chip `SPD EEPROM' (confidence: 8)
* Bus `SMBus I801 adapter at 1200'
Busdriver `i2c-i801', I2C address 0x51
Chip `SPD EEPROM' (confidence: 8)

EEPROMs are *NOT* sensors! They are data storage chips commonly
found on memory modules (SPD), in monitors (EDID), or in some
laptops, for example.

I will now generate the commands needed to load the required modules.
Just press ENTER to continue:

To make the sensors modules behave correctly, add these lines to
/etc/modules:

#----cut here----
# I2C adapter drivers
i2c-i801
# Chip drivers
adm1031
eeprom
#----cut here----


Do you want to add these lines to /etc/modules automatically? (yes/NO)


I selected "Yes".
Then in order to test it I ran the commands :

root@horus:/home/ubuntu# sudo modprobe i2c-i801
Password:
root@horus:/home/ubuntu# sudo modprobe adm1031
Password:
root@horus:/home/ubuntu# sudo modprobe eeprom
Password:
root@horus:/home/ubuntu# sudo depmod -a
Password:
root@horus:/home/ubuntu# sudo update-modules
Password:
root@horus:/home/ubuntu# sudo sensors
Password:
adm1031-i2c-0-2c
Adapter: SMBus I801 adapter at 1200
CPU Fan: 12053 RPM (min = 661 RPM, div = 4)
Case Fan: 16875 RPM (min = 661 RPM, div = 4)
SYS Temp: +57.0°C (low = +51°C, high = +70°C)
SYS Crit: +87°C
CPU Temp: +52.5°C (low = +46°C, high = +60°C)
CPU Crit: +75°C
AUX Temp: +0.0°C (low = +0°C, high = +80°C) DISCONNECT
AUX Crit: +100°C


I checked the /etc/modules file and all was correct. So I restarted Ubuntu and after booting I ran :
sudo sensors
But only got "No sensors detected".
To make the sensors work I had to run the unhide_ICH_SMBus first. In order to run the command in every boot I edited the file /etc/init.d/rc.local:
sudo gedit /etc/init.d/rc.local
Then I added the line calling unhide_ICH_SMBus first :

#! /bin/sh

PATH=/sbin:/bin:/usr/sbin:/usr/bin
[ -f /etc/default/rcS ] && . /etc/default/rcS
. /lib/lsb/init-functions

do_start() {
if [ -x /etc/rc.local ]; then
log_begin_msg "Running local boot scripts (/etc/rc.local)"
/etc/rc.local
log_end_msg $?
/home/ubuntu/unhide_ICH_SMBus
fi
}

case "$1" in
start)
do_start
;;
restart|reload|force-reload)
echo "Error: argument '$1' not supported" >&2
exit 3
;;
stop)
;;
*)
echo "Usage: $0 start|stop" >&2
exit 3
;;
esac

Afterwards I restarted Ubuntu and this time the sensors worked!

I decided to install a gdesklet to see the mother/cpu temperature in the desktop, unfortunately after trying every gDesklet that show sensors/temperature I gave up... none of them worked!!!
Finally I found the application that I wanted :

Computer Temperature Monitor


You can download the .deb package for Ubuntu Feisty here :
computertemp_0.9.6.1-0ubuntu1_all.deb
After installed with a simple double-click I right clicked in the task-bar and select "Add to panel" then browsed to
"System and Hardware" and selected "Computer temperature monitor".


Then the temperature reading appeared in the task bar :

Thursday 14 June 2007

Installing a Weather Desklet on Ubuntu 7.04

Finally I installed a working weather forecast desklet on my ubuntu 7.04 Feisty Fawn.
Here an screenshot :
I found many bogous desklets that only show error messages : Error retrying information, no connection,...
Finally I found a working wheather forecast desklet, if you want to install the same desklet follow the next steps :

First you must have gDesklet installed :
Go to the task-bar and select
System -> Administration -> Synaptic Package Manager
Then in the the top of the Synaptic Package Manager window, click the Search button.
In the search window type : gDesklets
Then select and install the "gDesklets" and "gDesklets-data" packages.
after that go to Applications>gDesklets.
And the gDesklets Shell window appears
(or in a terminal, type : gdesklets)

Afterwards in the menu select "File" and "Install Remote Package" and use the following URL :


After the downloading and installation you will see the GoodWeather desklet in the right panel.

Then double click on it and place it on the desktop.

Then configure the desklet with the right button and selecting configure then use your city code. To find your city code go to http://www.weather.com/ and find your city, then select it and watch the address bar of the browser and write down the code.
In my case was :
So my city code was : ARBA0009
Then paste the location code in the desklet's configuration panel. Then restart desklet.

There are lots of desklets in the site :

Wednesday 13 June 2007

Running Vice 1.21 Commodore Emulator under Ubuntu 7.04

Last weekend I installed Vice 1.21 - Commodore Emulator on my Ubuntu 7.04 - Festy Fawn.
First I downloaded the tarball (source code) from the site
vice-1.21.tar.gz
The official site of Vice is :
Vice Team
VICE is free software; you can redistribute it and/or modify it under the terms of the GNU General Public License as published by the Free Software Foundation; either version 2 of the License, or (at your option) any later version.
So don't be afraid to download it!

Then I opened a terminal and ran the commands In order to obtain the gcc compiler :
sudo apt-get install build-essential

Then I decompressed the file with the command :
tar xvfz vice-1.21.tar.gz
Then I changed the current directory to the /vice-1.21 and ran the command :
sudo ./configure
Then I ran :
sudo make

Then I got the following errors :
../../src/arch/unix/x11/xaw/uiarch.h:33:27: error: X11/Intrinsic.h: No such file or directory
../../src/arch/unix/x11/xaw/uiarch.h:34:28: error: X11/StringDefs.h: No such file or directory
In file included from ../../src/arch/unix/x11/xaw/videoarch.h:5,
from ../../src/arch/unix/videoarch.h:9,
from video-canvas.c:39:

So I Installed the libxt-dev package to fix the problem :
sudo apt-get install libxt-dev
Reading package lists... Done
Building dependency tree
Reading state information... Done
The following extra packages will be installed:
libice-dev libsm-dev
The following NEW packages will be installed:
libice-dev libsm-dev libxt-dev
0 upgraded, 3 newly installed, 0 to remove and 0 not upgraded.
Need to get 563kB of archives.
After unpacking 1675kB of additional disk space will be used.
Do you want to continue [Y/n]?

Then I ran again :

sudo make

And another error was reported :
FileSel.c:47:29: error: X11/Xaw/SimpleP.h: No such file or directory
FileSel.c:48:28: error: X11/Xaw/Simple.h: No such file or directory
FileSel.c:49:28: error: X11/Xaw/LabelP.h: No such file or directory
FileSel.c:50:27: error: X11/Xaw/Label.h: No such file or directory
FileSel.c:51:30: error: X11/Xaw/CommandP.h: No such file or directory
FileSel.c:52:29: error: X11/Xaw/Command.h: No such file or directory
FileSel.c:53:27: error: X11/Xaw/FormP.h: No such file or directory
FileSel.c:54:26: error: X11/Xaw/Form.h: No such file or directory
In file included from FileSelP.h:25,
from FileSel.c:71:
DirMgr.h:86: warning: function declaration isn't a prototype
In file included from FileSel.c:71:
FileSelP.h:27:31: error: X11/Xaw/Cardinals.h: No such file or directory
FileSel.c: In function ChildrenCreate:
FileSel.c:767: error: labelWidgetClass undeclared (first use in this function)
FileSel.c:767: error: (Each undeclared identifier is reported only once
FileSel.c:767: error: for each function it appears in.)
FileSel.c:805: error: commandWidgetClass undeclared (first use in this function)
make[7]: *** [FileSel.o] Error 1
make[7]: Leaving directory `/home/ubuntu/vice-1.21/src/arch/unix/x11/xaw/widgets'
make[6]: *** [all-recursive] Error 1
make[6]: Leaving directory `/home/ubuntu/vice-1.21/src/arch/unix/x11/xaw'
make[5]: *** [all-recursive] Error 1
make[5]: Leaving directory `/home/ubuntu/vice-1.21/src/arch/unix/x11'
make[4]: *** [all-recursive] Error 1
make[4]: Leaving directory `/home/ubuntu/vice-1.21/src/arch/unix'
make[3]: *** [all-recursive] Error 1
make[3]: Leaving directory `/home/ubuntu/vice-1.21/src/arch'
make[2]: *** [all-recursive] Error 1
make[2]: Leaving directory `/home/ubuntu/vice-1.21/src'
make[1]: *** [all] Error 2
make[1]: Leaving directory `/home/ubuntu/vice-1.21/src'
make: *** [all-recursive] Error 1

So I Installed libxaw7-dev and libxaw-headers packages :

sudo apt-get install libxaw7-dev libxaw-headers

ubuntu@horus:~/vice-1.21$ sudo apt-get install libxaw7-dev libxaw-headers
Reading package lists... Done
Building dependency tree
Reading state information... Done
The following extra packages will be installed:
libxmu-dev libxmu-headers libxpm-dev
The following NEW packages will be installed:
libxaw-headers libxaw7-dev libxmu-dev libxmu-headers libxpm-dev
0 upgraded, 5 newly installed, 0 to remove and 0 not upgraded.
Need to get 389kB of archives.
After unpacking 1577kB of additional disk space will be used.
Do you want to continue [Y/n]?

Then I ran again :

sudo make

that finished without errors. So I ran :

sudo make install

I started the emulator via the x64 command to my surprise the screen was always black, If i pressed the left mouse button or the right button a menu appeared but the screeen was always black.
After googling a little I found the solution :
Just a simple change (a 0 for a 1) in the file :
vice-1.21/src/arch/unix/x11/xaw/uicolor.c

So I changed the line :
im = XCreateImage(display, visual, x11ui_get_display_depth(),
ZPixmap, 0, (char *)data, 1, 1, 8, 1);

for :

im = XCreateImage(display, visual, x11ui_get_display_depth(),
ZPixmap, 0, (char *)data, 1, 1, 8, 0);


Then I recompiled again with :
sudo make
then
sudo make install

Then the program worked!!!
Thanks to the open source it was posible to fix the game and play ASYLUM!!!
This is one of the benefits of having the code!!!

Here the screen with the compiling console, gedit with the source, and Asylum (a C64 Adventure Game) !!!


For those who don't know the Asylum game here is a link with the D64 disk image :

http://www.retrosite.de/adventure/asylum/asylum.html

Please, remember don't look up in Asylum!!! ;-)

Monday 4 June 2007

Data Execution Prevention NIGHTMARE!!!

Last weekend I used three new computers with Windows XP service pack 2.

The computers specs are :

Two Pentium IV Intel 3.0 Dual Core 925 775 with Asus P5V-VM and one Intel Core 2 Duo E6420 4MB with Asus P5N-E SLI

After a while the computers started to randomly restart without any messages.

This is the default behavior of Windows XP, after a major error the system automatically reboots without showing any message or warning, just the same if you unplug/plug the power supply. Yes! another good idea by Bill Gate$ .

In order to know what is happening I first deactivated this default behavior :

In the desktop select the "My Computer" icon, then right-click and select "properties" then in "Advanced" tab. Locate the Startup and Recovery area and click on the Settings button.
In the "Startup and Recovery" window, locate and uncheck the check box next to "Automatically restart". Click OK in the Startup and Recovery window. Click OK in the System Properties window.
So next time the computer won't reboot automatically.

After a few moments I got the first BSOD (Blue Screen of Death) the error was :

STOP: 0x000000FC (0xA8D347C4, 0x0CAAF963, 0xA8D34730, 0x00000001)


After searching the web I found the Micro$oft article 886348 :

http://support.microsoft.com/kb/886348/en-us

It was related to a "bad driver" or "WhoKnowsWhat" that was trying to execute in a memory data range. So the Data Execution Prevention (DEP) decided to reboot the machine without a message. I really hate this kind of "Big Brother's Tool" that monitor and take actions by its own.

Why do we need a monitor of our activities? Why doesn't it show a message to the user? It wasn't a virus, the machines are completely clean with few software installed.

According to Micro$oft site :

"These checks, known as software-enforced DEP, are designed to block malicious code that takes advantage of exception-handling mechanisms in Windows."

But who decides what is malicious code and what isn't. Yes, the decition is taken by the binaries of Micro$oft, that are plagued of bugs, errors and are reduntant and inefficient. So, don't be surprised that DEP takes incorrect actions.


So the OS decided to reboot on its own. And I decided to deactivate for ever this kind of Big Brother's Tools.
To do that I Clicked the "Start" button, clicked "Run" and typed the following command :

bootcfg /raw "/noexecute=alwaysoff /fastdetect" /id 1

That deactivated the DEP forever.

If you want to check if the command finished sucefully :

Click "Start", click "Run", type "sysdm.cpl", and then click OK. Then on the "Advanced" tab, under "Startup and Recovery", click "Settings" and in the "Startup and Recovery" dialog box, see if the line have the "/noexecute=alwaysoff" command.


After that neither computer has restarted again. The problem was M$ DEP.

It seems the PC had DEP activated when they made this commercial :