Wednesday 14 February 2007

Windows Vista - Cancel or Allow

I recently saw an Apple advertisement about the new security feature in Windows Vista. The User Account Control or UAC.
Basically the system is asking the user all the time if he "allows" or "cancels" the current software instalation/Settings changes or whatever. Obviously after a day the user starts to accept everything... making the User Account Control useless.

Here the video in youtube.com


Windows Vista — ¿Cancel or Allow?CANCEL

Monday 12 February 2007

Delayed Write Failed Nightmare

I bought a new hard disk (Seagate ST316002 - IDE - 7200 RPM ) and a new carrying case 3.5" (Noganet USB 2.0 External Case)
I connected it and partitioned/formated the hard disk and everything was done without problem.
Under Windows XP I started copying files and a pop up error message appeared :
"Windows - Delayed Write Failed"


What is that? Oh no!!! Another Windows Nightmare!!!
I checked the policies :
My computer -> Properties -> Hardware -> Device manager -> Disk Drives
Selected the ST316002 1A USB -> Device Properties -> Policies
and "Optimize for quick removal" was already selected. The other option is "Optimize for Perfomance". So why is Windows using a write cache to an external device if I selected the optimize for quick removal??? As usual, we will never know.
Then I Checked the use of memory :
My computer -> Properties -> Advance Perfomance Settings -> Advanced Memory Usage
Adjust for best perfomance of :
"Programs" (was already selected)
"System Cache"
Again everything seems fine... I rebooted and started again, but after a while the error message appeared...
So I googled and found 40 thousand matchs
"delayed write failed"
After more than an hour I read a lots of forums and I obtained a little program :
http://member.newsguy.com/~siccos/Max128k.htm
In the site the explanation is for Firewire, I installed it for an USB 2.0 port. The difference is that the Registry Key for my computer was :
HKEY_LOCAL_MACHINE\SYSTEM\CurrentControlSet\Enum\USBSTOR\Disk&Ven_ST316002&Prod_1A&Rev_0811\8&20afb40f&0
This helps a little, I was able to copy a file, something that I couldn't do before.
But it didn't completly solve the problem, with large files the problem arose again.
I tried everything I found in the forums... but the problem persists.
So I decided to open the carrying case extract some screws and found the chip inside it, over a black chip I read : "GL811E".
A chip made by Genesys Products
http://www.genesyslogic.com/econtents/product02.asp?minicidx=2&lastcidx=3&SN=34
After a while I discover the following site :
http://www.hollants.com/external_usb_controller_chips.html
That says :
"Both the OXUF922 and the GenesysLogic GL811E did not withstand my stress tests for a particular long period of time..."


And still the Error
Remains in my laptop
No matter how much I implore
No driver can soothe him
No fix remove him
And I must fear for evermore

Quoth the GL811E, nevermore
Thus quoth the GL811E
Nevermore...


Next Steps

I will try to force the USB1.0 by disabling the USB 2.0 Root hub and test again.

Friday 9 February 2007

The Ultimate 2007 Linux Diary

Some weeks ago I bought a blue Diary. It came with a price sticker in the front and a bar code in the back.

I tried to remove these labels carefully but unfortunately they were glued with some heavy industrial glue. So I decided to use a little alcohol in order to remove the glue, it worked but unfortunately the color of the diary was ruined.

Then I had and idea, paste some tux images to hide the ruined parts of the diary.

I started with some images, but after a while I realized that I was building the...


ULTIMATE LINUX DIARY 2007


Here the final images :

FRONT


BACK

Tuesday 6 February 2007

Notebook overheat problem or Frying Eggs on Presario 1500


Notebook overheat problem or Frying Eggs on Presario 1500

I remember when my wife was playing a game an suddenly the notebook shutdowns without a message, beep or anything.
These happened two or three times, at the beggining I tought : "is Microsoft Windows... everything can happen running it". But after a while I decided to investigate more, when I touched the back of the notebook to check whether any cables were unplugged or loose, I found that the notebook was very hot.
I thought "maybe it is an overheating problem" and I started to look for a temperature monitor program to run in my notebook on XP. At last I found that MotherBoard Monitor 5.3.7.0 , worked very well.
http://www.majorgeeks.com/download.php?det=311
I installed the program, my wife started the "SIMS 2" game again and when the temperature reached 80°C (176°F) the notebook shut itself down, for self preservation.
So at first I tried cleaning the vents blowing air to them. But that was not enough.
I openned the two back compartments in the base of the notebook, and left them open. That helps but sometimes is not enough.

After some googling I found a device by Targus with vents.
Targus Laptop Chill Mat - Cooling Mat
http://www.targus.com/us/product_details.asp?sku=PA248U
That helps a lot.
But in some extra heavy games, like the Sim2, even that is not enough.
So I made a home made laptop chill mat using two case vents and with this "gadget" the computer does not overheat.

As you can see my "gadget" is less beatifull but throws more air.

A few weeks later I bought a can of compressed air and blows the vents inside the notebook. That helps a lot, but one of my vent got blocked, So I had to open the notebook and move it with a screwdriver. After that the vent started to work again.

Installing PC-BSD 1.3.01 on a Compaq Presario 1500

Installing PC-BSD 1.3.01 on a Compaq Presario 1500

Getting The Installation CDs

The iso images can be obtained from the site :
http://www.pcbsd.org/?p=download

CD #1 - Main installation CD
FileName: PCBSD-1.3.01-x86-CD1.iso
Size: 691 MB
CD #2 - Multi-Language support for KDE & Essential PBI Pack
FileName: PCBSD-1.3-x86-CD2.iso
Size: 524 MB

Starting the Installation

I burned the cds without problem and started the computer with the CD1.


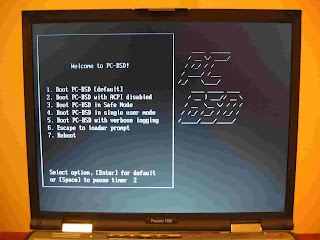
The PC boots without a problem and detected all the hardware all right.

I decided not to install the boot manager and selected the Advanced Setup in order to modify the disk partition.


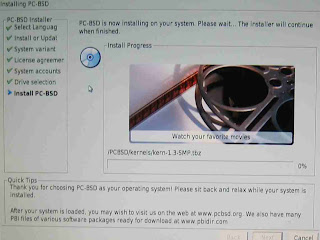
Then I configured the network setup and started the file copy process.

After the PC reboots I added the new operating system in the LILO boot loader (Linux), NT BootLoader (Windows XP), and Grub (Solaris) in order to be able to use the new operating system from every boot menu.

Solaris 10 uses grub so I edited the file /boot/grub/menu.lst. I have added the following lines :
title Windows
rootnoverify (hd0,0)
chainloader +1
title Xandros_Linux
rootnoverify (hd0,1)
chainloader +1
title PC BSD 1.3.01
rootnoverify(hd0,2)
chainloader +1

Xandros uses LILO so I edited the file /etc/lilo.conf. I have added the following lines :
other = /dev/hda1
label=Windows_XP
other = /dev/hda3
label=PC_BSD_1.3.01
other = /dev/hda4
label=Solaris
Then run "lilo" as root.

Windows XP uses the NTLoader. The easiest way I found is using the bootpart program
http://www.winimage.com/bootpart.htm
Just download, install and run (for example)
bootpart 3 C:\solaris.bin "Solaris 10"
This command should obtain the boot sector for the selected partition and then edit the boot.ini file automatically.
The old and classic way is booting Linux and run the command :
dd if=/dev/hda2 of=/mnt/disk_a/linux.bin bs=512 count=1
Then edit the boot.ini file in C:\ and copy the linux.bin in C:\

After booting I selected the PC-BSD and after the log in screen, the desktop appears.

Issues

I didn't have any issues yet!


Conclusion

The installation detected the video card without a problem and the process took half and hour. Very fast! I'm glad that Superkaramba is included, so in 5 minutes I downloaded and installed the liquid weather theme. As you can see below.


Next Steps

Test all the external devices.

Monday 5 February 2007

Installing Solaris 10 on a Compaq Presario 1500 Notebook


Installing Solaris 10 on a Compaq Presario 1500 Notebook

Downloading the CD Images

The images can found on this link : http://www.sun.com/software/solaris/get.jsp

I have a slow internet connection so I decided to download the autoextract CD images for windows :
Solaris 10 11/06 x86 CD 1, for downloading onto Windows Only, Multi-language sol-10-u3-ga-x86-v1.exe 166.74 MB
Solaris 10 11/06 x86 CD 2, for downloading onto Windows Only, Multi-language sol-10-u3-ga-x86-v2.exe 200.97 MB
Solaris 10 11/06 x86 CD 3, for downloading onto Windows Only, Multi-language sol-10-u3-ga-x86-v3.exe 101.41 MB
Solaris 10 11/06 x86 CD 4, for downloading onto Windows Only, Multi-language sol-10-u3-ga-x86-v4.exe 261.09 MB
Solaris 10 11/06 x86 CD 5, for downloading onto Windows Only, Multi-language sol-10-u3-ga-x86-v5.exe 230.71 MB

When I executed the .exe file the CPU went to %100 utilization and a message box appears...
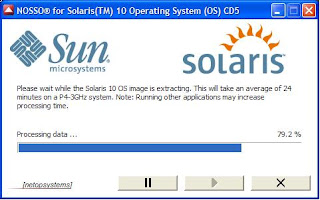
What?? 24 minutes on a Pentium 4 of 3 Ghz... Yes, it seems that the algorithm is very very complex... My CPU cried, it tought that I was running SETI@Home again.
My laptop (Pentium 4 - 2.4 ghz) took near 35 minutes per cd... so I spent 3 hours getting all the cds.
So if you don’t want to burn your CPU, download the iso images :

Solaris 10 11/06 x86 CD 1, Multi-language sol-10-u3-ga-x86-v1-iso.zip 308.14 MB
Solaris 10 11/06 x86 CD 2, Multi-language sol-10-u3-ga-x86-v2-iso.zip 373.95 MB
Solaris 10 11/06 x86 CD 3, Multi-language sol-10-u3-ga-x86-v3-iso.zip 168.22 MB
Solaris 10 11/06 x86 CD 4, Multi-language sol-10-u3-ga-x86-v4-iso.zip 588.05 MB
Solaris 10 11/06 x86 CD 5, Multi-language sol-10-u3-ga-x86-v5-iso.zip 437.26 MB

I burned the cds and noticed that each image only occupies half a CD, a waste of 3 cds.

Before Install

Unfortunately the magic number of a Solaris Partition is the same as a Linux Swap partition (the number “82”), so it is neccesary to be really carefull to avoid Linux overwriting all the Solaris partition, I remember many years ago when I installed a new RedHat Version on the same disk as an old Solaris and my Solaris was destroyed because Linux used the Solaris Partition as a Swap!!!
Another important things is that Solaris requieres a Primary Partition.
So I had to move my linux swap Partition to an Extended Partition, because Solaris could get confused.
But in my case I had to change another configuration, I’m testing Xandros on the same disk. And Xandros automatically generates the /etc/fstab file on every boot. So I had to deactivated this feature to avoid the Solaris partition getting overwritten, to do that I edited the file /sbin/etcdev2fstab
And changed the line :
My $flnm=”/etc/fstab”;
To :
My $flnm=”/etc/fstab2”;

In my case I didn’t have enogh unallocated space on my disk. So I had to defrag the NFTS partition consolidating all the free space and then shrink the partition. To do that there are various options. In my opinion PerfectDisk 8 is the best defragmentating utility, and another useful tools is Acronis Partition Manager or Partition Magic 8.

So my hard disk was configured as :
hda1 : NTFS - Windows XP
hda2 : Reiserf 3 - Xandros
The boot loader was LILO.


Starting Installation (Fasten Seat Belts)

I booted from install cd and accepted all the detected hardware, but something went wrong.
The detected hardware was :
Video Device : ATI Technologies Inc. Radeon Mobility M7 LW
Video Driver : XF86-RADEON
Resolution / Colors : 1024x768 - 256 colors
Screen Size : 15 – Inch (38 cm)
Monitor Type : Plug and Play Mfreq 15 Inch HSD1505 (up to 1345336625x758264139@-1979708863Hz)
My Display was split in four windows as you can see below.


So I spent more than 4 hours trying diferents video drivers, resolutions, monitor types.
The problem was that most of time when I tried different resolutions the display went all black and I had to reset the computer and start again.

At last!!! Yes At Last!!! I discovered that the following configuration worked well :

Video Device : ATI Technologies Inc. Radeon Mobility M7 LW
Video Driver : XF86-RADEON
Resolution / Colors : 1280x1024 16777216 Colors @ 85 Hz
Screen Size : 15 – Inch (38 cm)
Monitor Type : Multifrequency 90 Khz (up to 1600x1200 @ 72 Hz)
Keyboard Type : Generic Us-English (104-Key)
Poiting Device : Generic USB Mouse (3 button)

The Installation Screen appears :

And I relax for a while. Then I choosed the Instalation Type :

And click “Next”.

To my surprise the following screen appears :


“WARNING : A Linux fdisk partition was found on this disk (c0d0), which is the default bootdisk. Having a Linux fdisk partition on the same disk as Solaris fdisk partition is not supported.
Do you want to load the default layout?
Yes No”

What is that? I want to test Solaris on my disk, but I don’t want to uninstall Linux!!!
I really don’t like this kind of restrictions.
If I choose “YES” the default layout is all the hard disk for Solaris.... good bye Windows and Linux!I rebooted again, created a primary linux swap partition using Linux. Then when I reached that screen again I chose “NO” and selected the partition that I had created.

Finally the next screen “Ready to Install”


Then after a while the setup program asked for the location of the installation media, I choose “CDROM”, then it asked for the second CD, I inserted the CD, and I had to chose OK.
After 10 minutes the installation program asked again... about the installation media.!?!?
What? I’m installing using CDs.. so Why does the setup program ask again and again for all the 5 CDs???
Its crazy, but I had to select "from CD-ROM" five times. Then insert the CD, and press continue.
Finally after nearly an hour all the software was installed. So I Rebooted and Grub Appears:


Then I logged on and the desktop appeared.
After playing a little I was surprised by the old fashioned Screen Savers! They reminded me of the old times of the "after dark" screensaver in the beginning of the 90’s :
It has the classic Fireworks and the Spinning Lines :


Some Issues


1. When I rebooted the computer the greeting was “Welcome to unknow”

I have my computer connected to a broadband internet service provider with DHCP. So I opened a console/terminal and run the command :
setuname –n Horus
Then change the file :
/etc/default/dhcpagent
Deleting the value number ‘12’ because 12 is query Hostname to the DHCP server.
Now the welcome screen is :


2. When booting I can see a Message in the console : “Loghost could not be resolved“

These was resolved when I added the word “loghost” in the file /etc/hosts
127.0.0.1 localhost loghost


Conclusion

It wasn’t an easy installation, it took me aproximately 9 hours. I had to spend a lot of time decompressing the images, trying different video modes, and partitioning the hard disk to keep linux and solaris on the same hard disk.
If you want to install Solaris be really carefull with the partition manager. If I had chossen the “Default layaout” I would have destroyed completly the Linux and Windows installations on my hard disk.

Next steps

I will try to configure my external USB devices (printer, dvd writer, etc)